Once a Duckling

  • Home
  • Blog
  • Join my email list
  • About me
    • This is me!
    • Privacy policy
  • Projects on a budget
    • Easy Crafts and DIY
    • Easy home improvements
    • Furniture Makeovers
    • Seasonal decorating
      • Valentine’s Day
      • Easter / Spring
      • Summer
      • Autumn
      • Christmas
Once a Duckling > Seasonal decorating > Easter / Spring > Make your own Easter Topiary Centrepiece

Make your own Easter Topiary Centrepiece

Blog· Easter / Spring· Easy Crafts and DIY· Seasonal decorating

Well, this project sent me on a bit of a wild goose chase! You see, I had a more natural kind of looking topiary centrepiece in mind. With some natural moss to resemble a nest. But after visiting 2 stores, including a garden centre where I was certain they would have moss in stock, I came home empty handed. OK, maybe hunting for moss at short notice in a pandemic with most shops closed was not the best idea ever! And so I had to improvise. After all, I was making this little beauty in less than 2 hours on a Facebook Live (want to see this being made step by step? – just click on the link to craft along with me!).

Anyway, nothing like a bit of pressure to get creative 🙂 So after a rummage in my craft stash I decided on the following materials to get to work with:

here’s what you need to make your own topiary

1. A polystyrene ball (mine was 9 cm) – I can’t remember where I got mine, but Hobbycraft do slightly smaller ones at 8 cm here. Or slightly larger ones at 10 cm here.
2. Easter eggs – I used 22 of them. I bought mine at The Range at £1.49 for 6. Check your local craft shop for some bargains! If your ball is larger or smaller you will need to adjust the amount of eggs you use.
3. Hot glue
4. Some feather boa material (my alternative to the moss I had been hunting for). The lime one is not available at the moment, but this pink would look equally gorgeous!
5. A stick from the garden (keeping the cost down, but you can use a wooden or plastic dowel if you want and wrap some ribbon around it)
6. A terra cotta plant pot – from our local garden centre at £1.69
7. Some floral foam
8. Some pebbles to weight the pot down
9. And finally some raffia or shredded paper

It sounds like a lot of materials but you can get your hands on most of these on a budget! And some of them you’re sure to have in your home already.

here’s what I did

Like some of my projects I didn’t take any progress photos because I made this one on a Live. BUT, I’ll take you through the steps anway.

I started with adding some pebbles to the bottom of a terracotta pot to weight it down. It’s probably not strictly necessary as the topiary ball wasn’t heavy but I figured it wouldn’t hurt!

Next I packed the floral foam into the pot. Make sure you fill out those edges. You want to make sure there is no room for movement.

And now for the fun part – making your topiary ball! I pushed the garden stick into the ball to give me a reference point as to where it was going to be positioned. I didn’t at this stage attach the stick yet, but of course if you prefer to do this first you can do.

Next I glued the eggs onto the polystyrene ball in a random fashion. Once I had glued the layer around the hole I hot glued the ball onto the stick (because it was getting difficult to hold it at this stage!). Make a hole in the floral foam where you want the stick to go, put some hot glue in the hole, as well as on the stick and push into place. Next, put some hot glue in the hole of the polystyrene ball (that you created earlier) and on the stick. Push the ball onto the stick and hold in place until set.

This left the top half of the ball to complete. Just randomly hot glue the eggs onto the ball. There will be some gaps but don’t worry about these – we’ll be filling these up!

Just a small tip!

Adding hot glue straight to the polystyrene can cause it to melt. Adding the glue to the eggs and then pushing it onto the polystyrene may work better for you!

filling in the gaps

OK, this is where my moss would have come in. But in the absence of moss, I found this feather boa in my craft stash. It was a BRIGHT green, but figured it would work. It had originally bought it for a “Grinch” project at Christmas, but never got round to using it.

To fill in those gaps where the polystyrene is still showing, snip some of the boa and tuck in between the eggs. You can hot glue it down if you need to, but I found it tucked in nicely and wasn’t really going anywhere. Repeat this process all the way over the ball to fill in any bald spots.

finishing touches to complete your topiary tree

I tucked some raffia on the top of the pot, BUT I changed this off the Live! I found some yellow shredded paper which I thought matched the bright colours better.

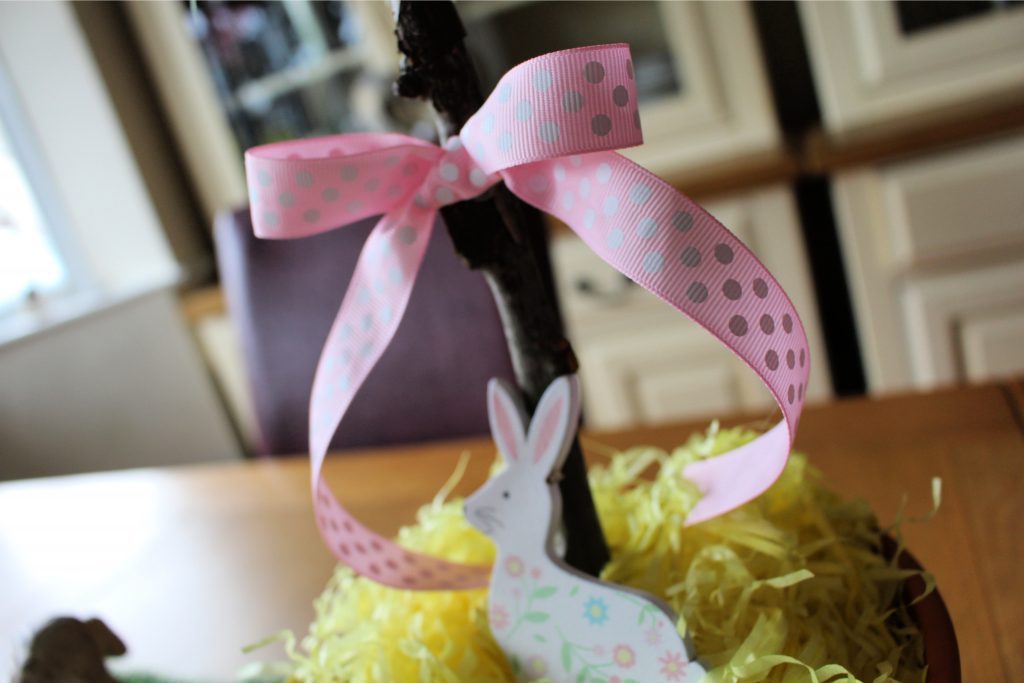
Finally, I hot glued a pink bow to the stick to finish off the whole project.

Easter-Spring-DIY-Topiary-Egg-Tree-Craft-Project

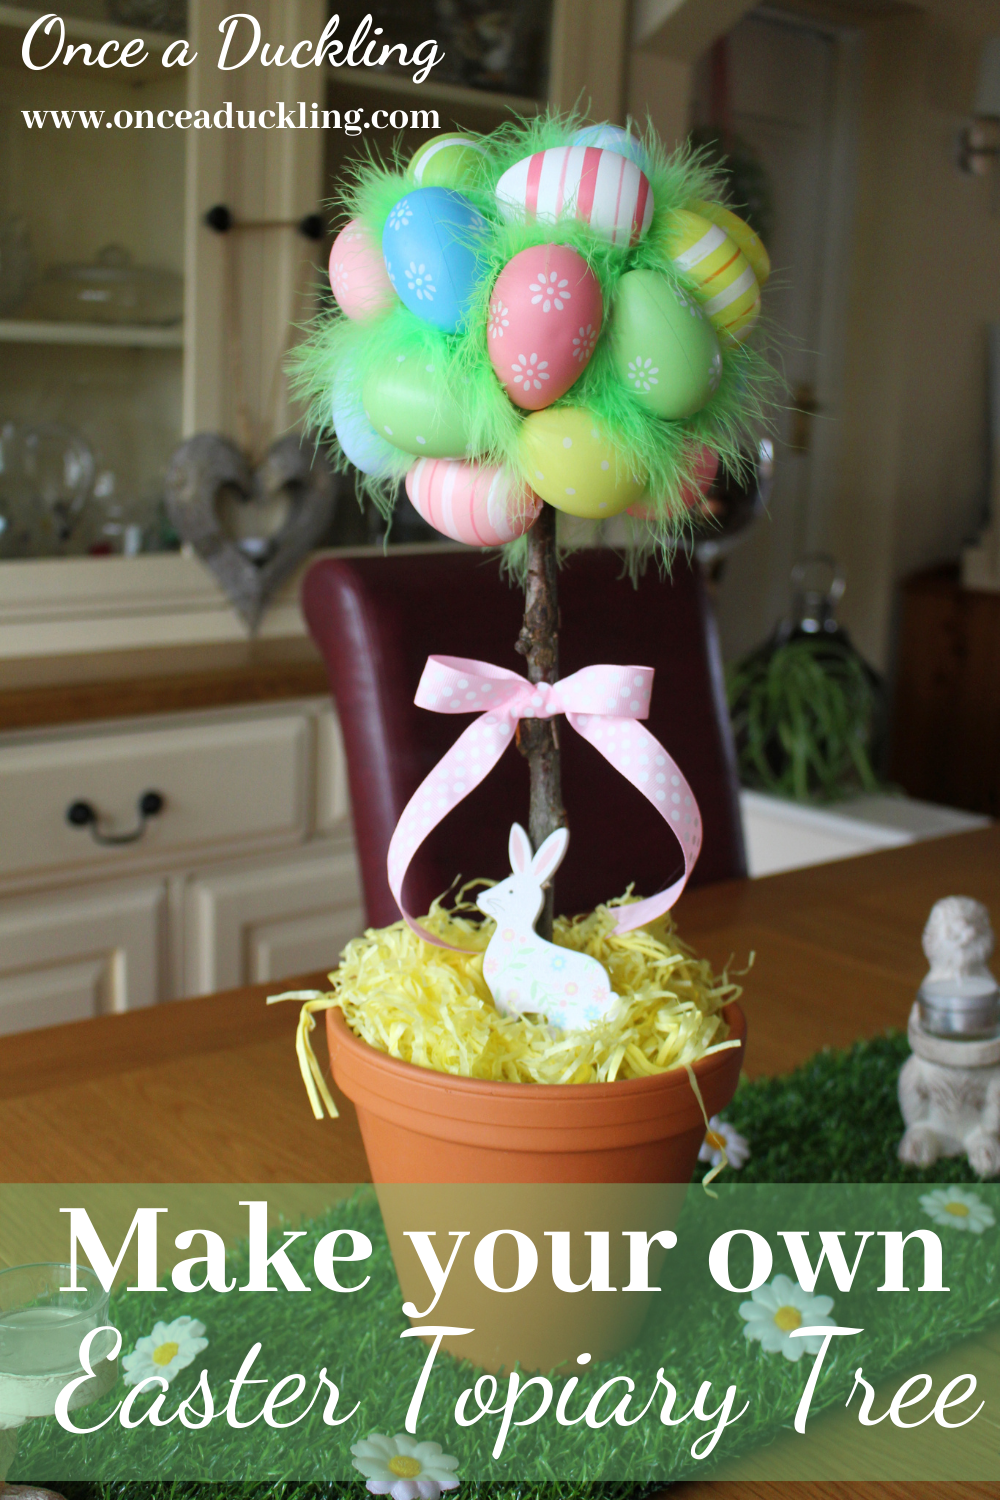
And here’s the finished article!

Easter-Spring-DIY-Topiary-Egg-Tree-Craft-Project

I actually really like how it’s turned out! Just goes to show – sometimes working with an alternative can work out for the best. Sure, it’s bright but it’s going to look perfect on our Easter breakfast table!

Easter-Spring-DIY-Topiary-Egg-Tree-Craft-Project

See the bunny bunting in the background? It’s SUCH an easy and fun project to make!! You can find the instructions (with a FREE template!) here.

Sharing is caring! Would you Pin this for me?

Easter-Spring-DIY-Topiary-Egg-Tree-Craft-Project

Some of the links in this post may be affiliate links, which means I earn a small commission if you decide to use my link to purchase something (at no extra cost to you!). This will allow me to continue to share great ideas and projects with you guys, so I would be grateful if you did! 

Want more Easter or Spring inspiration?

Click on the photos below to take you to the project!

serviette Mod Podge napkin craft project

Make your own Easter coasters!

Let’s have some Emoji Egg fun!

Follow me on Social Media!

  • Facebook
  • Instagram
  • Pinterest
Make your own Easter Topiary Centrepiece

Share this post:

Share on Twitter Share on Facebook Share on Pinterest Share on LinkedIn Share on Email

Leave a Comment

Previous Post: « Bright and Happy Spring Bunny!
Next Post: The one with the FRIENDS themed birthday »

Reader Interactions

Leave a Reply Cancel reply

Your email address will not be published.

Primary Sidebar

Hi guys!  My name is Marianne and I’m so pleased you stopped by!  I love decorating on a budget, as well as sharing fun, simple craft & DIY projects to turn your house into a gorgeous home.

But most of all, let’s have some fun along the way – it’s great to see you here!

Find me on social media!

  • Facebook
  • Instagram
  • Pinterest

Easter breakfast is one of my favourite family mea Easter breakfast is one of my favourite family meals 🥰. This was our table before the troops descended and caused chaos 🤣

Hope you’re all having a fab day too!! Happy Easter everyone 🐣❤️ #easter #eastertable #eastertabledecor
One thing missing from our Easter decorations (can One thing missing from our Easter decorations (can you believe it’s only 10 days??😳) was a bright Centrepiece for our table.  And I think I’ve achieved it!  It’s bright, bold and colourful and I think it’s going to look lovely on our breakfast table on Easter Sunday 🐣 

Details on how to create your own are on my latest blog post @onceaduckling  #easter #topiary #topiaryeaster #eastertopiary #eastercenterpiece
Do you follow me on Facebook?? Catch me for regula Do you follow me on Facebook?? Catch me for regular Live craft sessions!  Here’s one we made earlier today 🥰. What better way to welcome Spring?? 🐰🐰##livecraft #springcrafts #springiscoming #springishere
One of my absolute favourite things to do for each One of my absolute favourite things to do for each season is making some kind of drinks bar.  And this year is no different!! Not being able to get to the shops means reusing some of my items from last year. BUT with a bit of creativity you can give it a whole new feel!! 

Details of where I got my items, as well as some #freeprintables (so you can have your own tags and Cottontail sign), are on the blog @onceaduckling 

I’m secretly already looking forward to creating the summer corner (which will be featuring something completely different than hot cocoa!!🍓 

#eastercoffeebar #easterdecor #coffeebar #cottontailcafe #springdecor #freeprintable
Morning everyone!! It’s another day closer to th Morning everyone!! It’s another day closer to the clocks changing to summer time and I for one can’t wait!! Who else is ready for some Spring and Summer vibes? ☀️💐☀️

And talking about vibes ... how CUTE has this country vibe wreath turned out?  I hadn’t planned to make another wreath but this one just kinda happened naturally!  The bunnies from @therangeuk were just meant to sit on their little swing tucked inside this straw wreath, watching the world go by.  Check out the blog post on @onceaduckling for all the details. 

#springvibes #summervibes #countryvibes #strawwreath #springwreath #springwreaths
Happy Wednesday!! In between painting our newly pa Happy Wednesday!! In between painting our newly panelled bedroom wall (which we hadn’t planned BUT that’s a blog post story for another day 😜), I’ve had time to sneak in a few Easter projects!!

And the beauty of this project?? It’s  suitable for ALL occasions!! See the coasters?  They’re  plain gloss tiles covered with a napkin.  When you can’t find the perfect coasters .. get creative!! All details are on the blog @onceaduckling 

Have a great St Patrick’s Day!! 🍀🍀

#easter #eastercrafts #coasters #coasterset #modpodge #modpodgecrafts
Oh my .. the weather is doing ALL sorts of things Oh my .. the weather is doing ALL sorts of things here today!! But we’re all set for Spring indoors .. and Easter is only about 3 weeks away!! Still .. that means you’ve got PLENTY of time to add some bunnies to your home 🐰 

This little lady has pride of place back in our lounge 😍. I got her on Market place last year and she still makes me smile 😊 

Do you have a favourite Easter decoration? 

#easter #easterdecor #thumper #eastermantle #springiscoming #springisintheair
Meer the latest member of our family 😜🤣. I c Meer the latest member of our family 😜🤣. I completely forgot I made this little cutie last year and found him among my Easter decorations. 

I’ve been adding all our Easter/Spring touches to our home and I’m SO ready!! Roll on blossom, longer evenings and sunshine !!☀️ 

#easter #easterdecor #easterbunny #modpodgeproject #modpodgecrafts
Outside it may be back to rain this week, inside S Outside it may be back to rain this week, inside Spring has definitely sprung!! I’ve added Spring colours in most downstairs areas and I’m loving this latest addition to our hallway.  Sign from @hobbycrafthq and letters from @therangeuk 🥰

I made this fun floppy ear 🐰 sign on a FB Live and the details are now on the blog too.  Head over to @onceaduckling for details how to make this fun simple sign for your home! 

#easter #eastersign #springiscoming #easterdecor #easterdecorations
Follow on Instagram

Want to know about my Privacy Policy?  Sure thing!  You can find it here.

Copyright © 2021 · Refined Theme on Genesis Framework · WordPress · Log in