Easter breakfast is kinda a big deal in our household. It’s not quite Christmas morning but it’s pretty special! And I always try and decorate our table slightly different than the year before.
So you may have seen my recent post where I made the Topiary Easter Centrepiece for our table? Well, I had already bought some mini terracotta pots and was actually going to make some smaller versions with some mini eggs. But then I had a light bulb moment .. place name holders! It would be SO cute for each of us to have their own. And just a bit different from having a whole forest of trees on the table! And so here’s what I did ..
what i used to make the glitter easter egg trees
Polystyrene Eggs – I used these ones from Hobbycraft. Or Amazon do them here.
Acrylic paint in different colours of your choice – I just went for the pastel spring colours
Primer (optional) but I chose to prime my pots before painting them
Paint brushes
Small terracotta pots – I used an 11 cm diameter pot which were 55p from our garden centre
A dabber brush or small pom pom (optional) to make the polka dots
Mod Podge
Some sticks from the garden
Floral foam
Reindeer moss – mine came from Hobbycraft here, or you can use colourful shredded paper
Diamond dust
Some name place cards (optional)
Some small eggs to decorate (optional)
painting the pots
Here’s my little terracotta army all lined up and ready to be amazing! 🙂

I started with priming all the pots on the outside. They’re not going to get wet and they probably won’t get a lot of wear and tear, but I found using the primer makes it easier to achieve the bright paint colours in the next step.
As you can see Simba is NOT impressed and wanted to walkies instead!! 😉

Leave the primer to dry before reaching for the acrylic paint. I knew I wanted to use some of the pretty pastel Spring colours. So I painted them in a combination of yellow, pink and light blue. Leave to dry and re-coat if needed.
To add some more detail I wanted to add some polka dots (I’m a bit polka dot obsessed!!) and had a play with some of the different ways you can do this. Originally I wanted to use a sponge dabber like this one here. However, it had got squashed in transit and was more a oval shape than a circle. And the one I had was a bit too big .. oopsie!
So I found this cotton wool pom pom and figured that would work. I attached it to a peg to avoid messy fingers and started dabbing away.

The peg didn’t work for me (i.e. .. it was getting on my nerves!) and so I reverted to just holding it. Have a bit of a practice and find a technique that works for you!

painting your polystyrene easter egg
Paint your polystyrene egg in a colour of your choice. I went for the same colours as I knew I wanted to mix and match them! I started with the top half but soon things got mucky when trying to hold it (I believe I may be THE messiest painter!!). In the end I took a fondue fork to put the egg onto – it make it a LOT easier to paint. Leave to dry and give it another coat if you need to. Leave to dry fully.


With a sharp knife make a very small cut at the very top of the egg. This step is optional and you only have to do this if you want it to hold a name card!!
Bring on the glitter!
The next bit was my absolute FAVOURITE part!! I tried different techniques for this. Attach your Easter egg to the stick from the garden. It makes it much easier to do the next bit.
The first egg I Mod Podged in two sections. I used the line on the egg as the guide to brush it on.

When you’ve got good coverage of your Mod Podge, grab your diamond dust and a spoon. Make sure you put some paper under your project so you can catch the excess glitter! You will want to save this for another project! Sprinkle the glitter onto your Easter egg, turning it as you go, making sure you cover all the Mod Podge.

Can you see how it turns that whole cheap “polystyrene look” to expensive sparkle and glitter?!
Repeat the process for the top half of the egg. Leave to dry.
You should be pretty egg-cited by now (sorry .. I just couldn’t resist!!) to complete all the other eggs. I know I was!! They just look SO amazing and sparkly!!
The rest of the eggs I did without breaking it up in 2 parts. As it’s quite a small project you’ve got enough time to do this. Put them aside and leave to dry.
You can actually see me do this part on a Facebook Live where I made these – you can catch the replay here.
finishing your glitter easter egg tree
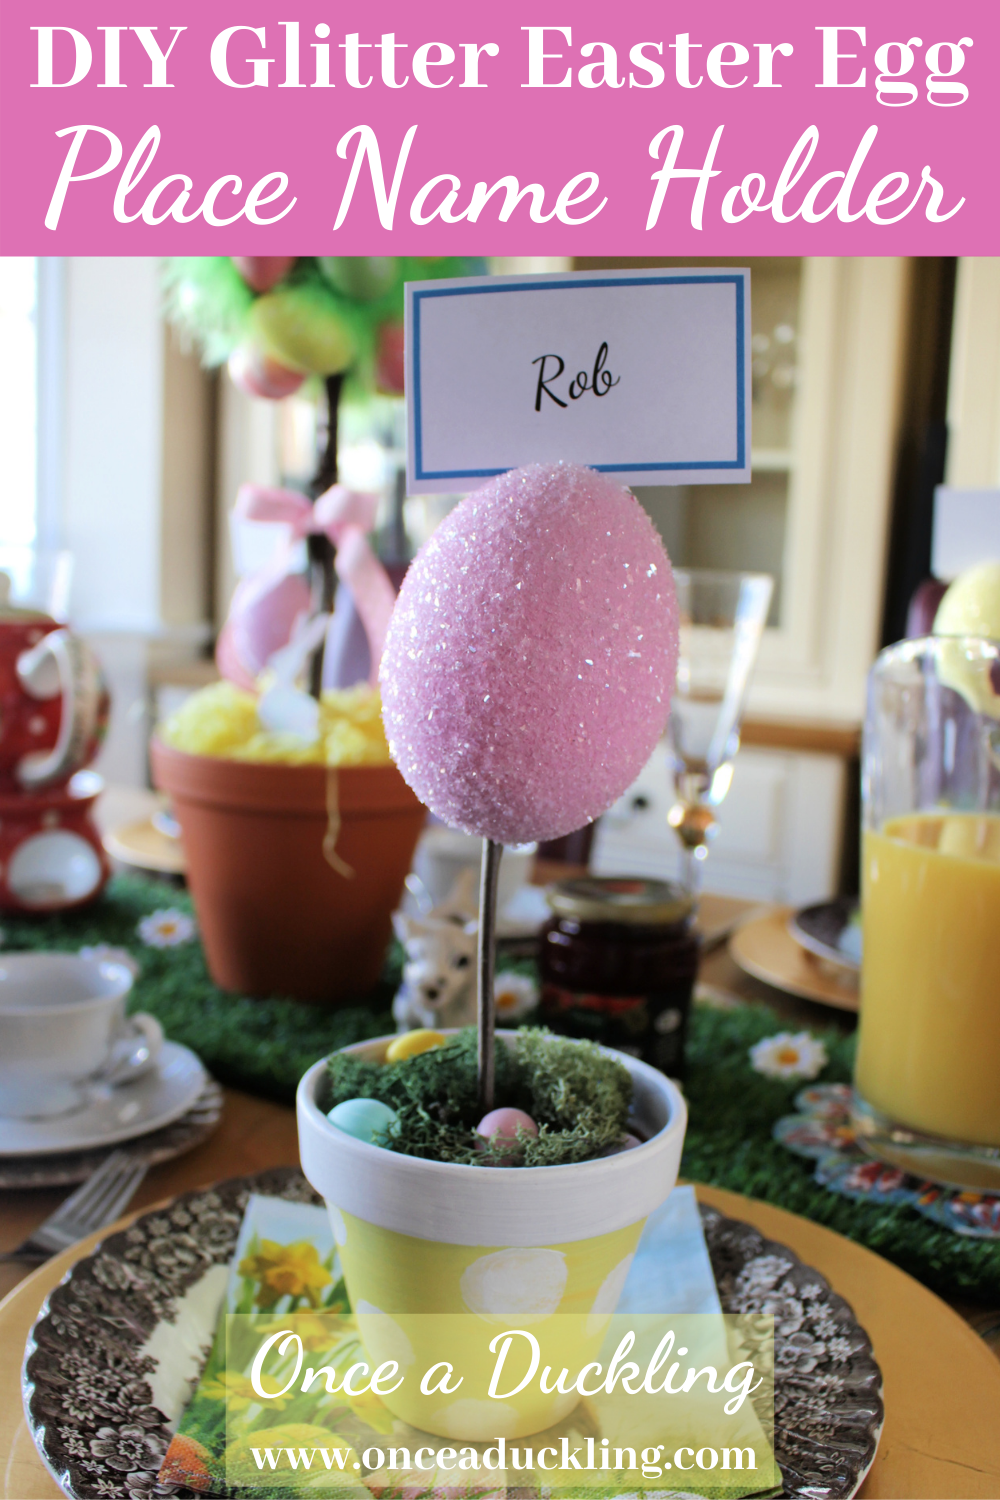
Fill your terracotta pot with some floral foam and push your stick with the egg in the foam. Fill up the top with some reindeer moss. I sprinkled some eggs on the moss for a bit more colour.
You can add some chocolate eggs but because of the diamond dust I would make sure these are wrapped sweets! This diamond dust is made from very fine ground glass so if any of the glitter does fall off you want to make sure none gets eaten!!
Are you ready? Let me show you how they turned out!! I’m warning you, there’s a LOT of glitter on the next few pics 🙂

And here’s a close up just so you can see that sparkle.

I dressed our table to give you an idea of what it looks like for Easter breakfast! It’s not quite finished yet (I normally sprinkle LOADS of mini eggs on the table but I figured they’d be gone by the time it’s Easter!!)

It’s just so bright and colourful.

And a final look on how the colours all tie together with the Topiary tree in the background too 🙂

Did you like this project?
Would you Pin it for me?
Some of the links in this post are affiliate links, which means I earn a small commission if you decide to use my links to purchase something (at absolutely no extra cost to you!). This will allow me to continue to share great ideas and projects with you, so I am very grateful for your support!
Check out some of my other Easter projects!


Follow me on Social Media!
Leave a Reply