I’m on a mission!! I’ve got a tree to fill with some cute Halloween decorations. I have bought a few things and it’s a start, .. but there’s ALWAYS space for more! They can’t be too big (it’s a small-ish tree 😉 ) And I don’t want to spend a fortune. So, this ghost garland seems to tick all the boxes. I still had some yarn left over so let’s put it to good use!

here’s what I used for my ghost garland
Some cream coloured yarn – I still had this in my craft stash
A few left over bits of ribbon
Googly eyes
A piece of cardboard of approx 10 x 10 cm
Hot glue
Scissors – these are my favourites!
Some string
Wooden beads or some pom poms (optional)
Here’s how simple it is to make this cutie!
Get a piece of cardboard. Cut to size, depending on the size of the ghosts you want to make. Mine measured approximately 10 x 15 cm. I wrapped the yarn around the smaller part of the cardboard 50 times. That seems like a lot, but the yarn was thin! If you’ve got thicker wool you can definitely reduce the amount of times you wrap this.
Once you’ve wrapped the yarn around the cardboard, cut off another piece of yarn that is long enough to tuck underneath the loop and tie a knot.


Take the loop off the card. If you just want to hang your ghost on the tree, leave the strands at the top as a hanger. If not, hang them down the side of the “body” and make sure they are part of the next step.
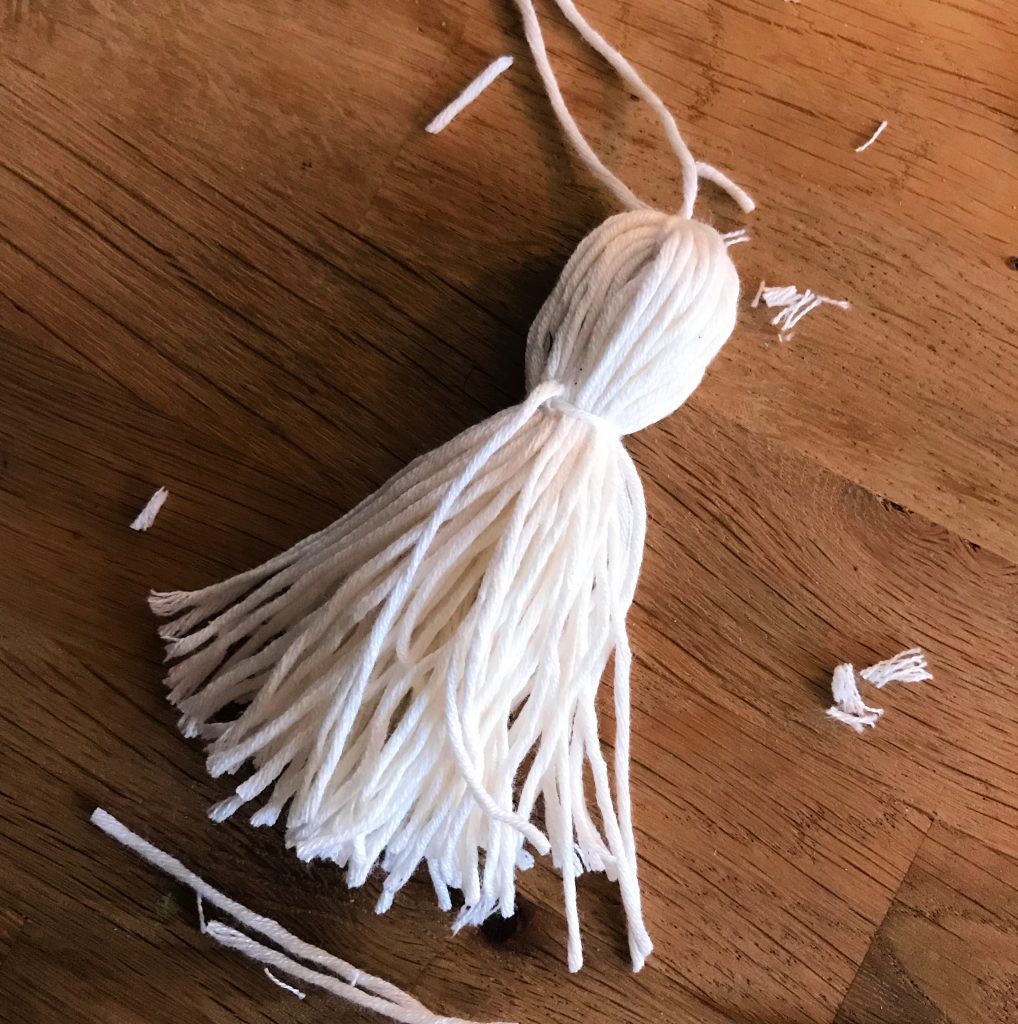
Place a piece of yarn around the loop, where you would like the head to be. Tie this and secure with a double knot.


Take a pair of sharp scissors and cut the loops at the bottom of your ghost.


Things are starting to take shape! They just need a bit of a hair cut 😉 Cut the bottom strands to the same length.
adding some cuteness!
They’re looking like ghosts, but we just need to make them a bit cuter! As with a lot of my projects, it’s ribbons to the rescue. I am sticking with the whole orange and black but work with whatever you’ve got in your craft stash!
Cut off some small pieces of ribbon, crisscross them and tie them with a small piece of yarn. They don’t have to be perfect – they just have to be adorable 😉

Depending on your preference, either tie the ribbon around the neck of the ghost, or hot glue them on.
And finally, hot glue on some googly eyes. Alternatively, grab a sharpie or a waterproof marker and draw on some eyes.
I went for a smart “tuxedo” look, mixed with a more casual gingham orange 🙂


Putting together your ghost garland
Depending on how long your want your garland to be, create as many ghosts as you need.
Putting the whole thing together is as easy as taking some string and pulling it through the loop of the “head” of the ghost.
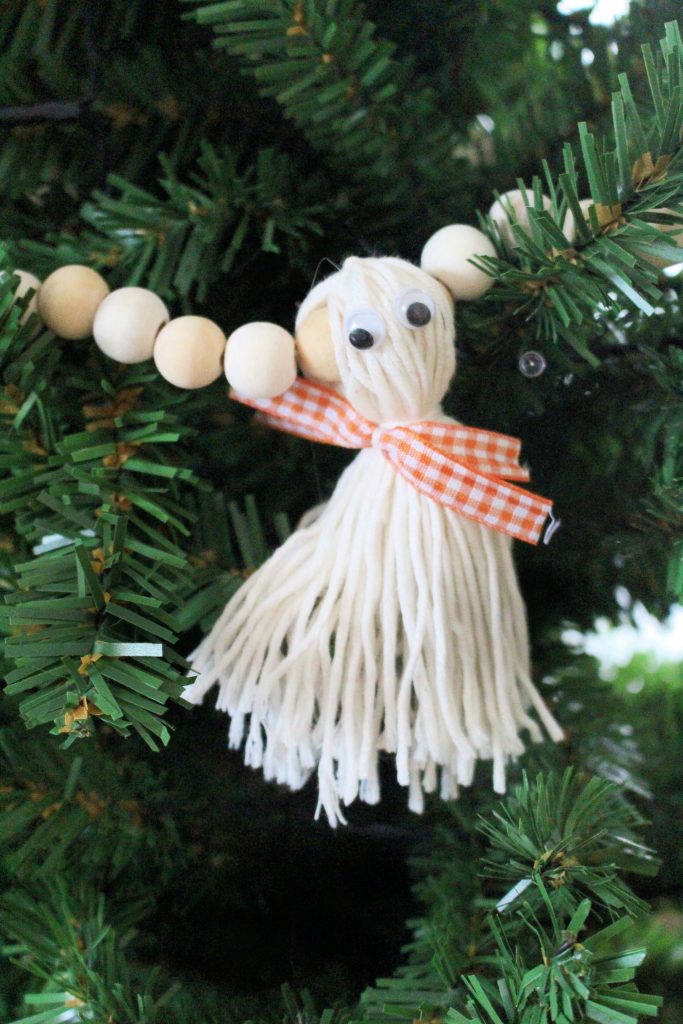
I’ll probably hang them on the tree as individual little ghosts, but here’s what they look like with some wooden beads that I added in. An another option, you could use some pom poms for this step too.

I can’t wait to see what they’ll look like on the tree once it’s all decorated!
I think you’ll like some of these other Halloween projects on the blog!


Would you Pin me for later?

Some of the links in this post may be affiliate links, which means I earn a small commission if you decide to use my link to purchase something (at no extra cost to you!). This will allow me to continue to share great ideas and projects with you guys, so I would be grateful if you did!
Follow me on Social Media!


Leave a Reply