Do you see those cute Easter basket centerpieces that are around on Pinterest but don’t know where to start? I know they can look super-complicated, BUT making your own simple display is actually SO much easier than you may think! I did one on a Facebook Live recently and it took me less than 30 minutes! And that was including me chatting away about absolutely anything 😉 You can catch the whole video here so you can craft along with me.
But don’t worry, I’ve made a list of everything you need and taken some screen shots from the Live too. They are not exactly HD quality (and there may be a few funny faces from the still images 😉 ), but it’s just so I can show you step by step too.
what you need for your Easter basket
A basket or container
A focal point – I used one of these bunnies as the main star
Oasis (floral foam)
Hot glue
Tooth picks (to secure the bunny)
Variety of greenery, flowers and floral picks – check out the selection at The Range
Pair of pliers (to cut down the flower stems if needed)
Other decorations (I used a big Easter egg)
prepping for your focal point
I bought this little guy and wanted him to be the star of the show. So I want him to sit a bit higher in the Easter basket.

So, first things first, I cut a piece of floral foam and hot glued it in the center of the basket. It’s only so it’s not moving anywhere, so just a small amount of hot glue at the bottom will do the trick.

Next, I filled out the basket with pieces of floral foam that were slightly lower in the basket. I didn’t glue these down, but made sure they were pretty much packed in there.

To secure the bunny I decided to add some tooth picks to his feet – OUCH, right?! I thought it would be less messy than using hot glue and much easier to remove at the end of the season when I want to re-use the basket for a summer display.
Once the toothpicks are in his feet, it was a case of just pressing him into the center bit of floral foam.


Filling up your EAster basket
To cover up some of the floral foam I used some shredded paper/cardboard. I used a neutral color (which I can’t see online), but you can totally go for a brighter colour paper. You will not see a lot of it, it’s just to cover up any gaps and give a nicer finish.

I wanted to add some more height to the Easter basket and picked up these flower picks from our local garden centre (but you can find them in various places!). I placed them on either side at the back of the bunny. It really gives a lot of volume to your basket already and I love how you can see it building so quickly.

As I still had some yellow flowers left over, I pretty much stuck to the yellow theme, with a bit of blue thrown in here and there too.
And so I opted to add one yellow Sparkly Easter egg on the side of the bunny. We made these last year with some diamond dust and I’ve been looking at re-using them for different projects. You can find the post on how to make your own from some simple polystyrene eggs here.


It’s filling up quickly!
You can see how quickly you’ve already filled up your basket! All that’s left now is to fill the front, which is simple a case of pushing in some flowers and fill up the gaps.
I had some sunflowers and other bits left over from the Sunflower Wreath we did recently and thought they would work perfectly for this flower bed.
Simply start off with some of the bigger flowers. Cut the stems to size with a pair of pliers if needed. I recommend starting off with leaving the stems slightly longer at first – cut down gradually if needed.
It’s then a case of pushing them into the floral foam – You can always adjust the placement if you’re not 100% happy with it! I’m forever tweaking and adjusting.
Here’s how mine looked by the time I’d finished my Live project.

If you’ve not got a lot of flowers, you can always create a little carrot patch and fill up with little Easter eggs. There are so many options! But I really recommend you have a go – you’ll be surprised on how quickly you can put something fun together!

And here he is working in his little flower patch.
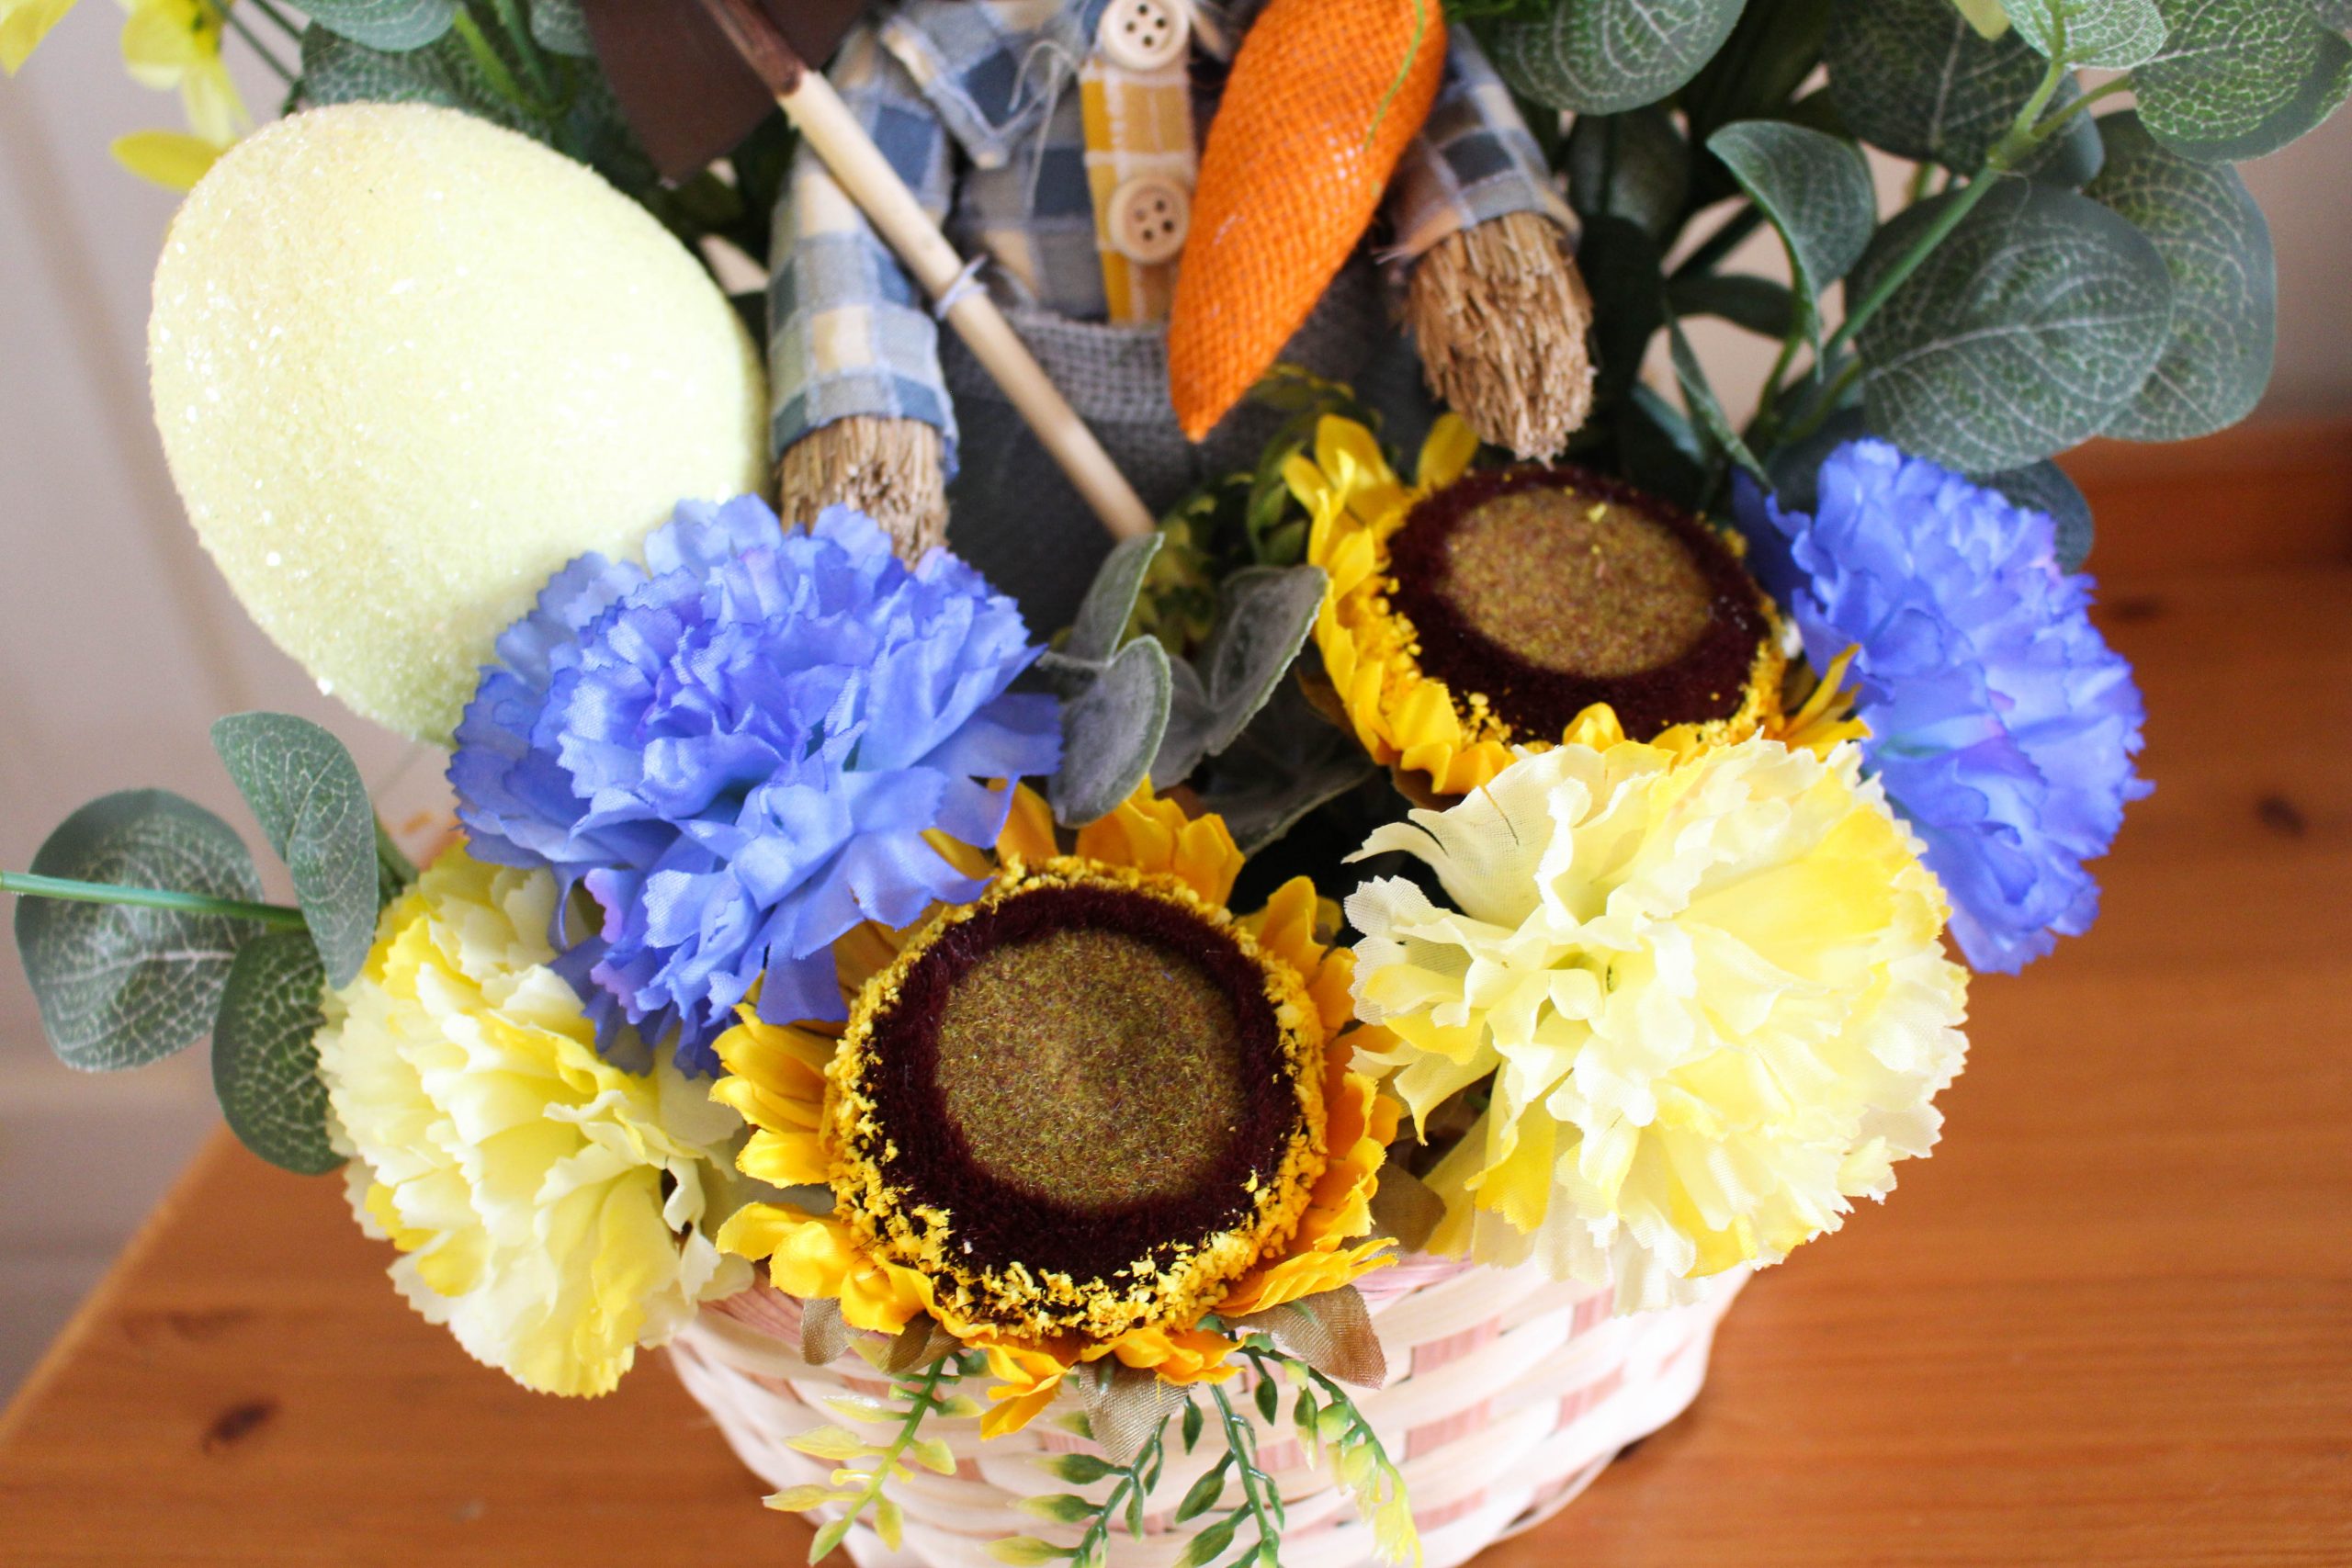
I think the sunflowers work really well with this – they really help you to fill out that basket!
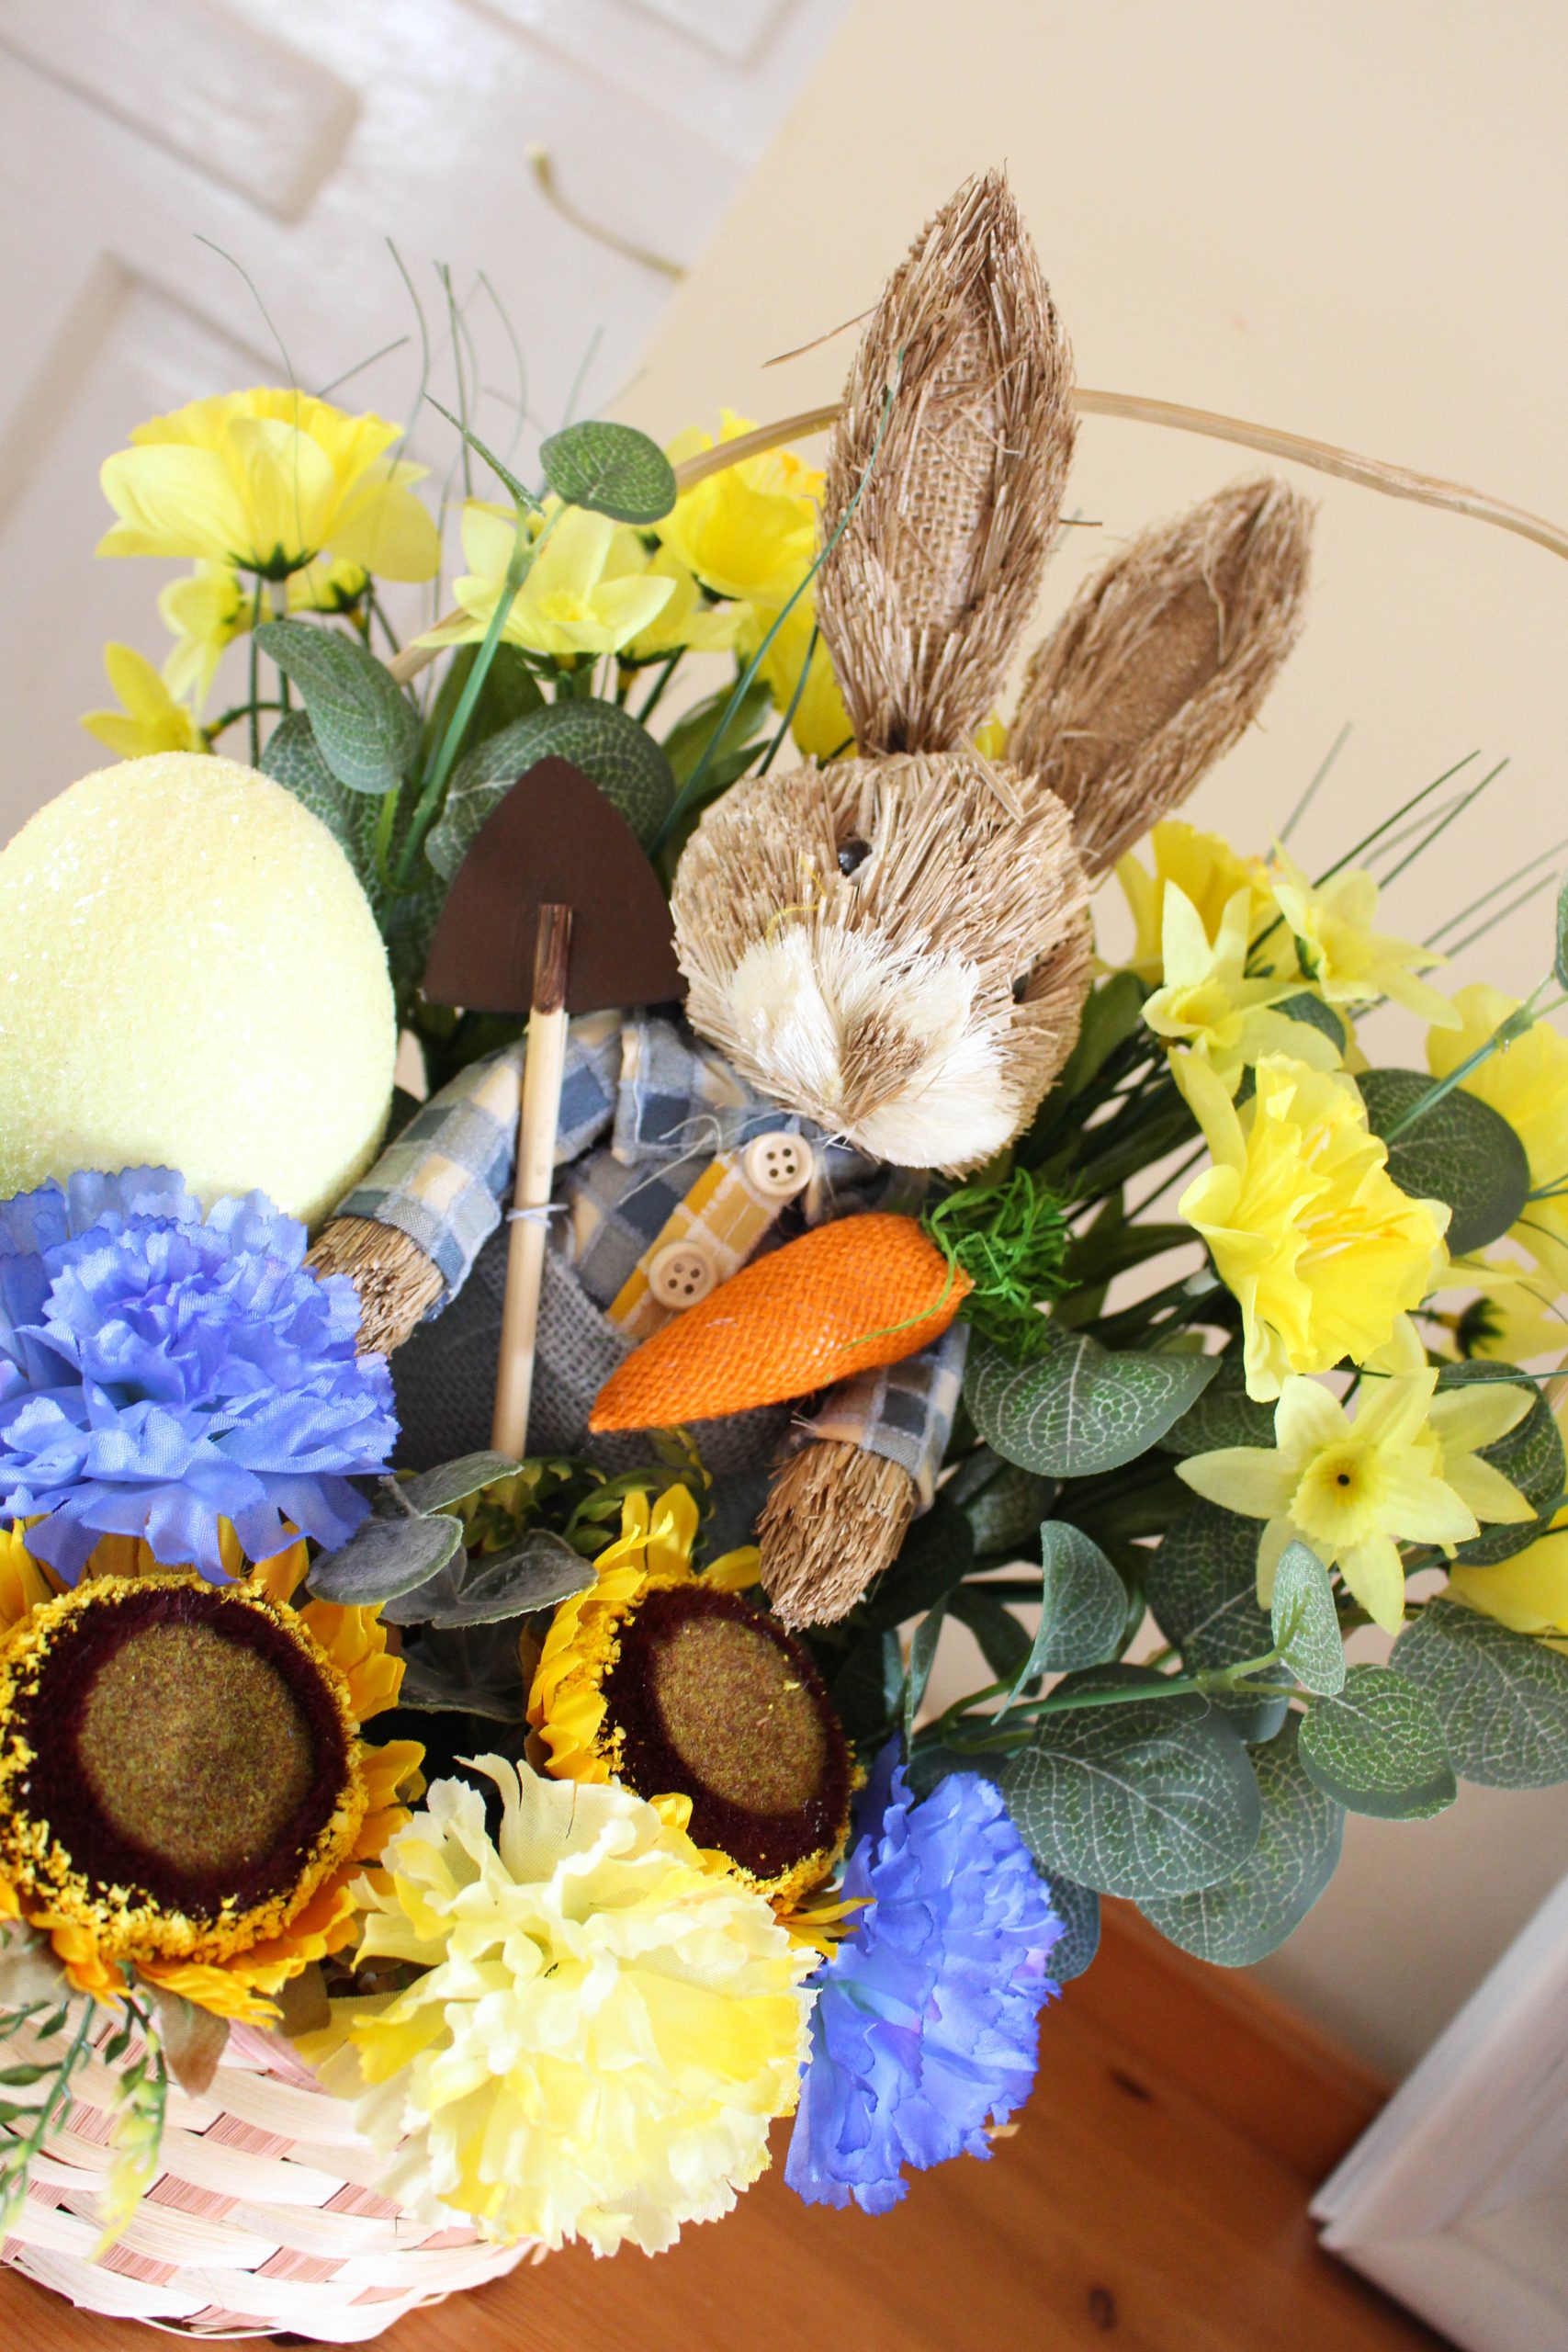
One last glance at his cute little face.

Let me know if you’ll be giving this a go!
Please Pin me for later!

Some of the links in this post may be affiliate links, which means I earn a small commission if you decide to use my link to purchase something, at no extra cost to you! This will allow me to continue to share great ideas and projects with you guys, so I would be grateful if you did ?
Here’s some other projects I think you’ll love!


Follow me on Social Media!


Leave a Reply