I’m a sucker for lights! Anything I can do to add some lights somewhere? I’m there! Maybe that’s why I love Christmas so much. I mean, what better excuse to have loads of candles and fairy lights? (Not that I need an excuse 😉 ) So, when I saw this jam jar light sconce idea I immediately knew I wanted to try and make one. And I’m so pleased I did – I’m super-excited how this turned out.
Heads up .. It’s a long post but it’s not complicated, I promise! Let me show you how you can make your own!
what you need for your jam jar light sconce
- A jam jar – you can use an old jar or get a mason jar like I did. I bought mine at Home Bargains for the bargain price of £0.69.
- Lights! I got mine from a company called lights4fun who are also on Amazon. They are called Microlights and they are the warm white variety, but they do them in different finishes. (Be aware they don’t come with any batteries).
- Craft rope
- Twine rope
- Hot glue gun
- A flower or some greenery – I got mine from the local garden centre
- A piece of wood
- A hook for hanging your masterpiece
If you want to see me make this, you can catch my Facebook video below. It explains in detail all the different steps of putting it all together.
So now you know how to put together the jar, let me show you how I made the base to hold it. This involves a bit of DIY, BUT don’t run away!! You’ll be fine, I promise!
making the base for your jam jar light sconce
Ironically this took less time than putting the rest together 🙂 I took a piece of scrap wood, big enough to leave some space on either side of the jar. Make sure you allow enough room at the top and the bottom too. Sand it until it is nice and smooth – it makes it a LOT easier to stain it.
Turn over the piece of wood and take your battery pack that is attached to the light. Measure it for size and place 2 small blocks of wood at the top and the bottom of the pack. Make sure that the pieces of wood are slightly taller than the pack. (See the picture below – see how the wood sticks out higher than the pack?).

Next, secure the pieces of wood into place. I did this with a nail gun, but you can do this with some long screws too. (If you use the screw option, make sure you pre-drill them to prevent them from splitting).

With a saw I made a very small groove into the bottom piece of wood. This is where the lead will sit to keep it in place.

Last of all, I drilled a hole into the piece of wood, roughly in the middle. This is to pull the little lights through from the back to the front. You just need to make sure the drill bit is big enough to create a hole that allows the lights to pull through. You can see this in the pic below 🙂

Stain the wood in a colour of your choice.
Finally, add a hook on the front to hang your jam jar and drill some holes to allow for some string to hang it up. You can see this in the final results photo at the bottom of this post.
Putting together the jam jar light sconce
So, to hang your jar you’re going to need some craft rope and some smaller twine rope. For the actual handle I used a craft rope that was 4 mm in diameter. Add a bit of hot glue on either side of the jar. If you’ve got a jar with some detailing such as a mason jar, make sure you are keeping the detail in the middle by gluing the rope on either side. Measure out how much rope you need and cut to size, but leave a fair bit of excess hanging down the side to allow to make the handle. Glue into place like this:

Next, take your smaller twine rope and get this stuck down with some hot glue. You’re going to wind this rope around the top of the jar various times to add some detail. Go over the top of the bigger rope that you’ve glued in place. This will keep the rope in place as well as adding some nice rustic detail. Add a few dollops of glue as you go to stick it down.
Once you are happy with the effect, finish the rope at the back of the jar, snip off the end and glue the end into place.

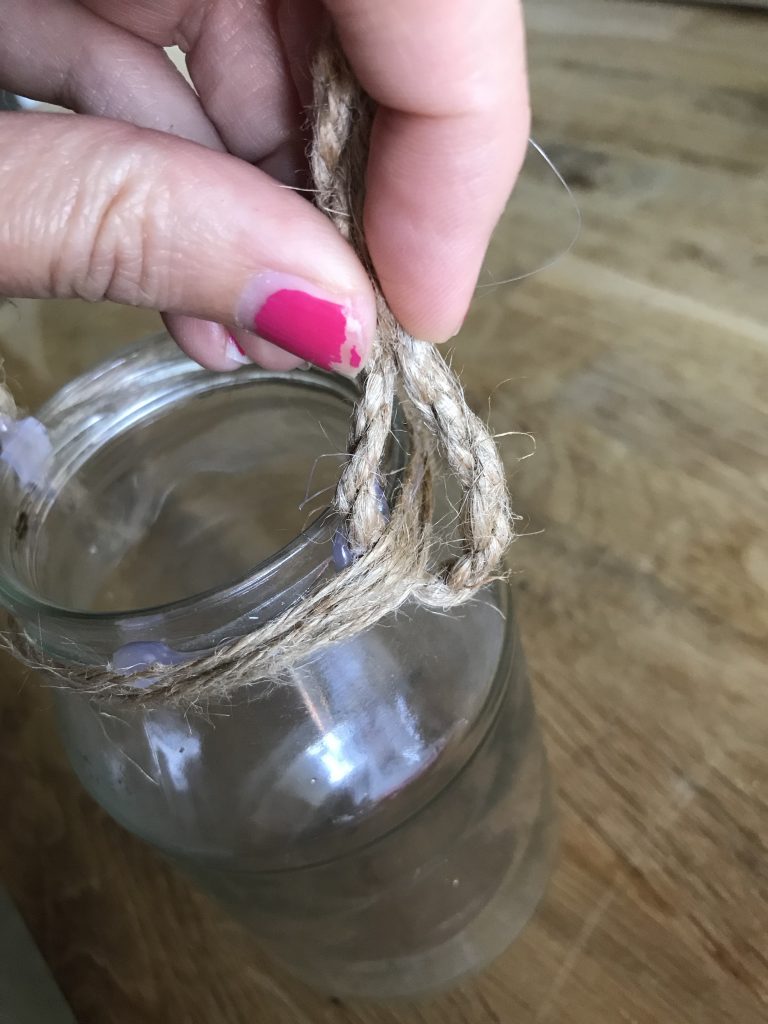
Pull up the excess of the rope that is hanging down the side of the jar and form a little loop (see the first picture below). Glue this into place with some hot glue.
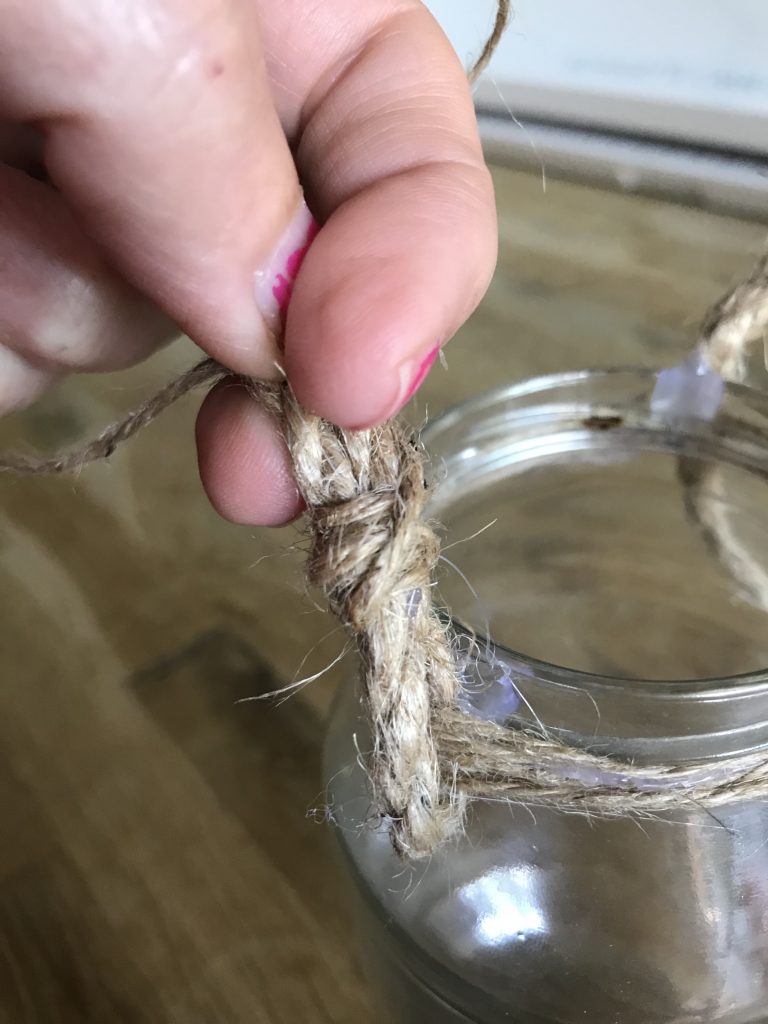
Take some more thin string which you are going to wind around the loop that you’ve just created. Glue this into place before you start winding. Wind around the two pieces of rope until you’re happy with the look (second pic).
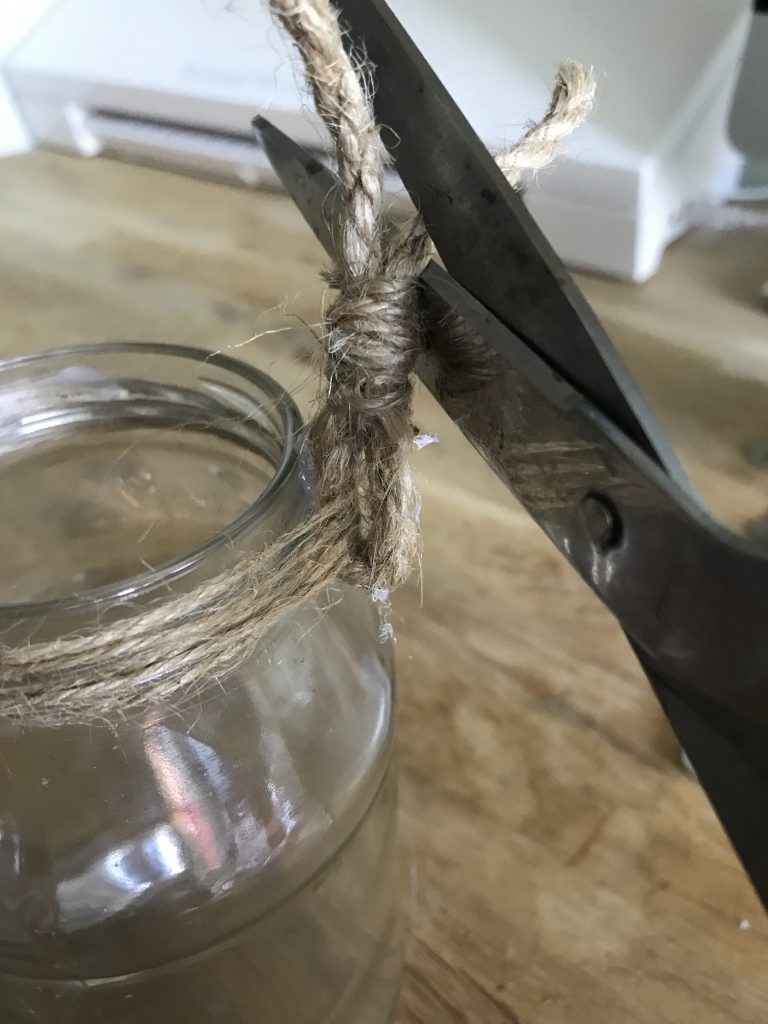
Finish off by adding some more hot glue and snip off when it’s in place. Cut off any of the excess from the larger rope on the top of the loop (third picture). All these steps should look something like this (or check out the video where I explain it in detail too).
Repeat the exact process on the other side. Once you’ve finished both sides, the tricky part is done! I think this jar is looking pretty cute already! You could add an electric tea-light and have them hanging all around the garden in the summer time. How cute would that look? Be careful with adding real tea-lights because of the heat – not sure how the heat would combine with the rope!

Adding the lights and flowers to your jar
If you have a set of lights with a smaller battery pack, you could get away with just adding the lights and hiding the battery behind the flower.

For the one I have used, it was a case of threading the lights through from the back to the front of the holder. Push the lights into the jar and place the flower on top. I pulled the top of the flower off the stem and it sat nicely in between the rope handle and the jar. However if you need to, add a small amount of hot glue where the flower is touching the jar and push into place.
And that’s it – I am so pleased with how this has turned out! It just adds a bit of colour and light to a dark area. I know this has been quite a long post but I wanted to make sure I gave you all the close up pics and information 🙂
Pin me for later!

Some of the links in this post are affiliate links, which means I earn a small commission if you decide to use my links to purchase something (at absolutely no extra cost to you!). This will allow me to continue to share great ideas and projects with you, so I am very grateful for your support!
Follow me on Social Media
Leave a Reply