No doubt you’ve seen them? Enter, the CUTE gnome .. They’ve been around for a few years now, and people are adapting them for all seasons. They’re also know as a gonk .. the funny little fellow with his hat pulled waaaay too far over his eyes, but resting on his big nose. Which makes him look even more adorable! And did you know it’s sooo easy to make your own? A simple mop and a sock goes a LONG way towards making one of these friendly guys! Be warned though, it’s addictive 🙂 Before you know it you’ll have them EVERYWHERE!
Here’s what you need
- A polystyrene cone (that’s how I made these guys). The slightly larger one came from Hobbycraft.
- A mop refill
- A long (knee height) sock of your choice
- Hot glue
- A small piece or ribbon or string
- A large wooden bead or small bauble
How to make your gnome
Now, because I made the large one on a Live I don’t have any photos of how I made him. BUT, you can catch the video here.
However after the Live, I couldn’t resist making him a little friend and so I made a slightly smaller one and I took some photos of the process. Excuse the quality of the photos – for some reason I always end up doing these things late in the evening when the lighting is not so great!
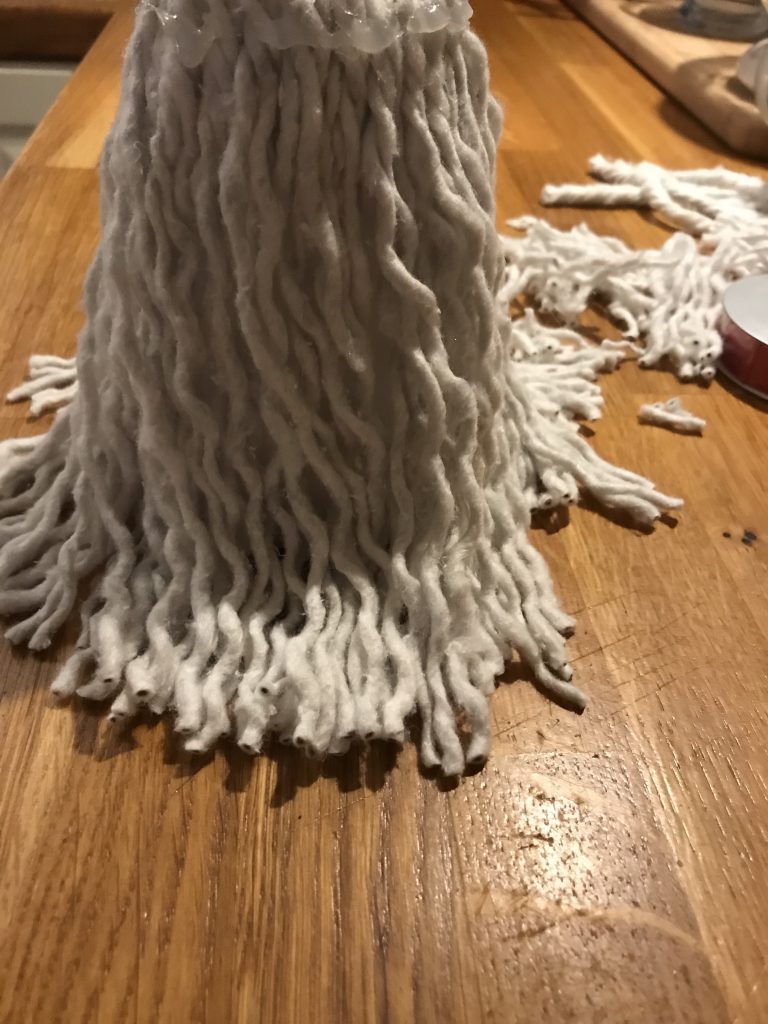
Start by cutting off the strands of the mop. Hot glue them to the cone, roughly about half way up. Do this all the way round. So it looks like this. I know, it’s looking super-funky at the moment, but trust the process!! All will be fine!! I promise.

Next I hot glued a line of glue on top of the strands. This is to avoid them unraveling during the next step!

Next, you get yourself a cup of tea. You’ve earned it! And it’s going to get your through the next bit. Because this next bit is going to take a bit of time (it’s not difficult!!) – just unravel all the strands you’ve just hot glued on. This will give his beard a fuller look and will take away the “dreadlocks” look!


As you can see, it’s looking a bit unruly so I gave the beard a bit of a haircut. I left mine so it’s a bit longer than the cone to have it falling on the floor but it’s up to you! I’m a shockingly bad hairdresser – you definitely wouldn’t want me anywhere near you with a pair of scissors!

making the hat
When you’ve done that it’s time to add his hat. Make sure you’ve got a knee length sock to make a nice long hat that can “flop” over on the side. Where the ankle is, tuck the foot part into the long part. Like this:


Make sure it’s tucked all the way up and pull this part over his head.

Have a bit of a play with how you want the hat to sit. Take a small bit of ribbon or string and tie a bow on the end of the sock. If this doesn’t sit quite right, you can add a small amount of hot glue to keep it in place where you want it.

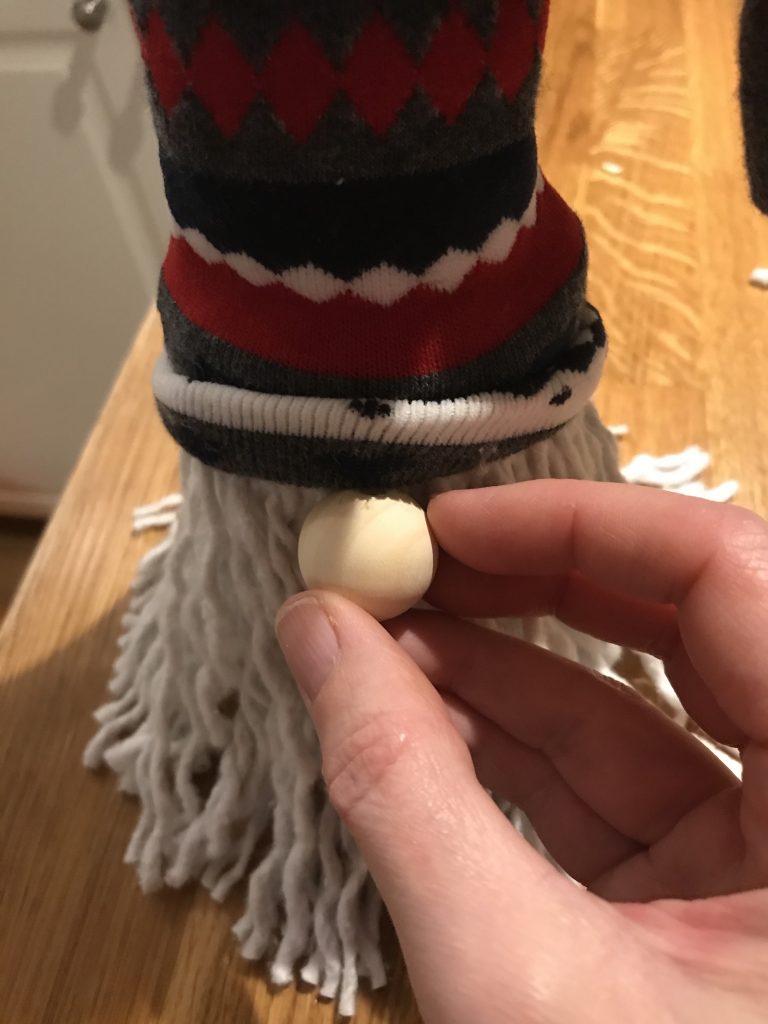
For the big gnome I used a small red bauble to add his nose. Just because .. well .. I could! I love colour and wanted to make him slightly different than all the other gnomes! Just remove the little cap and tuck that part under his hat before gluing the bauble onto the beard.
However, for this one I used a wooden bead. I glued the hole facing up, to hide it under his hat. Just glue it on top of the beard and it’s all done.
And you’re all done! All that’s left is to choose your favourite place to show off your gonk gnome. And perhaps add a few more friends?

I can tell this is going to get kinda addictive and I can see myself having gonk gnomes for all seasons! (Which, if you don’t hot glue the socks, it will just be a case of replacing the socks for a different theme!! Easy peasy!!)

How cute do they look all huddled together?

Would you Pin me so others can find these cuties too?

Some of the links in this post are affiliate links, which means I earn a small commission if you decide to use my links to purchase something (at absolutely no extra cost to you!). This will allow me to continue to share great ideas and projects with you, so I am very grateful for your support!
Follow me on Social Media!
Leave a Reply