When I saw this back of PYO (“Paint Your Own” .. who knew? 🙂 ) bunnies in The Range for only £2.99, I knew I could do something to transform them. These three little Easter Amigos would look amazing in bright Spring colours! And whilst I rebelled and didn’t actually paint them .. I think they have turned out equally as adorable!
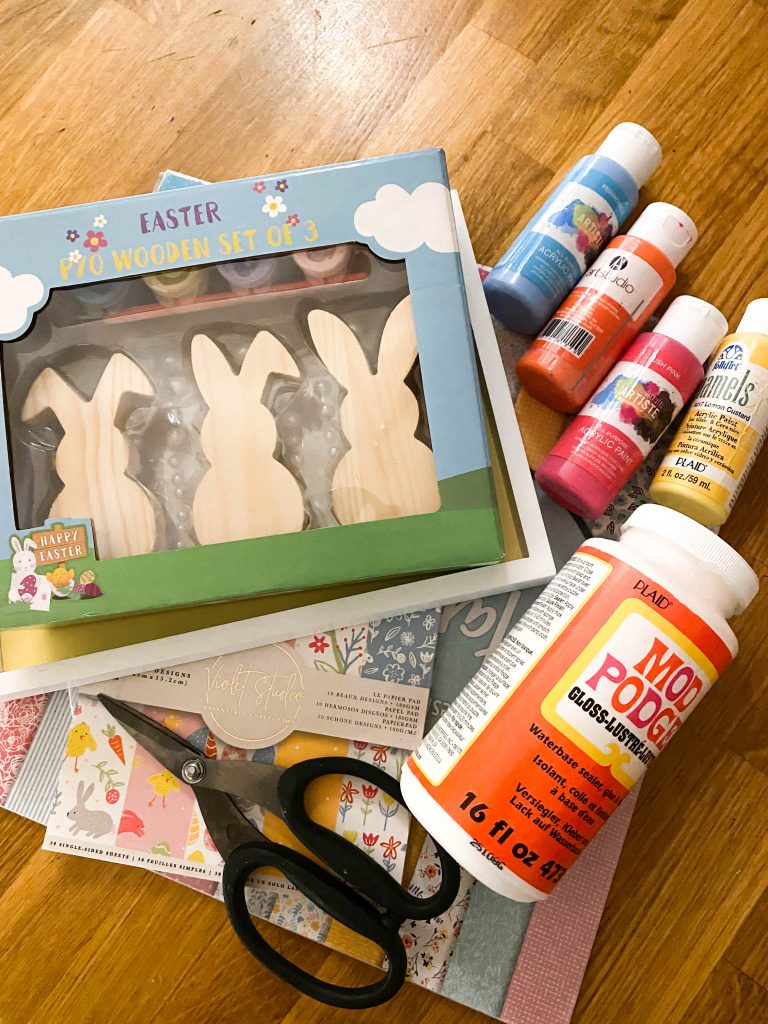
here’s what I used to transform my little Easter Amigos
Of course this list is just a suggestion – substitute with what you’ve got to hand or can find in the shops
This pack of PYO Easter bunnies
A small frame that we transformed
Some cardstock – these are not the exact same Easter ones but very similar!
Some other design pad ideas
Mod Podge
Acrylic paint in your favourite bright colours
Some left over pastel pom pom trim for their cute little tails
Hot glue
Some flat brushes
Wooden craft letters
Small bows in blue and pink
Left over ribbon
Let’s transform our sign first
I really like using these type of frames (especially if you can get them at a cheap price in the sale!), because they allow you to completely make them your own without having to build a frame yourself. I’m all for keeping things simple!
In this case I took off the bunny tail, cut a piece of turquoise scrap paper (my absolute favourite colour!) to size and used Mod Podge to glue it down.
By the way, I made this one on a Facebook Live session so you can go back and check out the video here if you want to craft along!
Bunnies!!!
Once the paper was down, I turned to make over the three Easter Amigos 🙂
First I traced the bunnies over the paper I was going to use and cut the paper to size.

I then painted the sides of the bunnies in bright acrylic paint that complimented the paper I had picked out for them. In my case it was. bright pink, orange and blue. Leave to dry, or get a hairdryer to give the drying process a helping hand.

Once your paint is dry use your Mod Podge to attach the paper cut out onto your bunny. Press down and leave to dry completely.


Once it’s fully dry, if the paper is slightly too big for your bunny, you can now sand down the edges with a small emery board nail file (perfect for small items and getting into those small grooves!)
To fill up some of the space in the frame I used some left over ribbon to add to the bottom half of the sign. I attached this with double sided tape.
I used some of my scrabble wooden craft tiles to spell the words HIP HOP, but of course you can spell whatever works for you.

I used hot glue to secure the bunnies into position. Now, they already looked adorable as they were, but I wanted to add some little bunny butt tails. I had a small bit of pom pom trim left over and cut off some of the colorful pom poms before hot gluing into place on their tushies.

If you want some more detail, add some small bows in coordinating colours to finish off your Easter Amigos!
AFter the Live
When I looked back I wasn’t completely happy with the finish on the background paper! I obviously did too much talking and not enough concentrating on my Live (see the bit of yellow background peeping through?). I hot glued some thin rope around the inside of the frame. Just to hide where I’d not cut the paper completely to size.
Weird also how the light makes SUCH a difference to a photo – I assure you, it’s the same paper!


Anyway,.. that’s it! Now don’t tell me that hasn’t turned out adorable?

I’m still working on my Bunny coffee bar and will probably try and incorporate it if I’ve got space! Or I’ll find another place for it.

I hope you enjoyed it as much as I did! If you do make one of these, please let me know – I’d love to see your version of it!
Please PIN me for later!

Some of the links in this post may be affiliate links, which means I earn a small commission if you decide to use my link to purchase something, at no extra cost to you! This will allow me to continue to share great ideas and projects with you guys, so I would be grateful if you did ?
I think you’ll love these ideas too!


Follow me on Social Media!


Leave a Reply