The bunnies in our house are taking over!!! There are bunnies popping up everywhere ;). .. but of course you can never have enough! Especially for Spring and Easter time. And so when I saw this Hobbycraft bunny shaped wreath for only £6 (bargain or what?!) I knew I wanted it. It actually took me a while to get hold of it as they kept being out of stock on line. I put my name on the “Yessss!!! Let me know when it’s back in stock” list and waited. And it was worth it!
If they are out of stock and you can’t wait, Amazon do a similar one here.
I thought I would just get the wreath, but when it arrived it already had flowers and Easter eggs attached to it (which I completely failed to notice on the order ..) There was nothing wrong with it, but I knew I wanted to put my own spin on it and had a specific idea of what I wanted to do.
Anyway, here’s what the bunny wreath looked like before I gave it the “Once a Duckling” treatment. Can you see I’d already started pulling it apart?? I’ve managed to save some of it for other projects!

Of course you’re good to go and hang this up just as it is. But, you know me .. I’m always up for a quick project and makeover!
Putting my own spin on the bunny wreath
It didn’t take me long to get rid of the plastic leaves, the eggs and the flowers. Some of them I could not take off completely, but that was OK as I knew I’d be covering up the patches.
Because I made this one on one of my Facebook Live sessions I don’t have any progress pics, BUT, you can catch the video here. It’ll show you exactly how I used a blossom garland and the double bow to COMPLETELY change the look of this bunny wreath.
It was as simple as taking the old greenery off and replacing it with the flowers from the blossom garland. Tuck the flowers under the wire and hot glue them on where needed.

what i used to create the bow
You are so used to seeing me make a messy bow, but this time I wanted to create something a bit different! I got this EZ Bow Maker as a Christmas present. Because it had to be sent from the US, it was a bit more expensive .. BUT if you like making bows for projects or wreaths it’s well worth the investment! If you don’t want to spend that much, Amazon do some bow makers too. I’ve not used these actual ones but they’re worth checking out!
I’m still getting to grips with using it (after all, I’ve only had it for over a year .. sigh .. ) but it’s SO MUCH fun to create a gorgeous bow. You know, without having to be an octopus and needing 8 hands!!
My Facebook Live video will show you how I ended up making this gorgeous double bow. Alternatively, there are SO many YouTube videos showing you tutorials. Like this one here.
For the ribbons I used an Etsy shop called USATOUKWREATHS – You may recall, I used them for my Carrot Patch sign too. They have the most amazing selection of ribbons and the ones I used for this project were just the perfect colours for what I wanted.

making some changes
Looking at it again the day after the Live I decided I didn’t like the contrast of the full flowery bottom of the bunny compared to the bare top. So I added some more flowers to the head of the bunny.
Here’s what it looked like after the Live ..

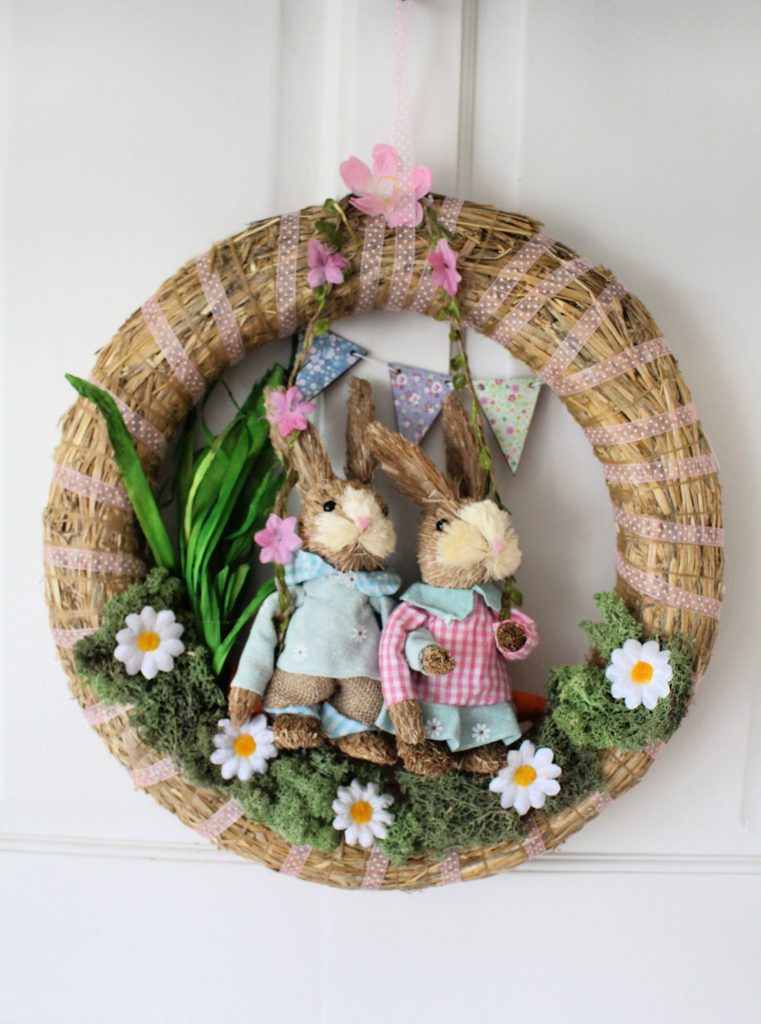
And here’s how it looks now

Just one final look at the before and after. What a difference, right??

Would you Pin me for later?

Some of the links in this post may be affiliate links, which means I earn a small commission if you decide to use my link to purchase something (at no extra cost to you!). This will allow me to continue to share great ideas and projects with you guys, so I would be grateful if you did!
Want more Spring inspiration?

Follow me on Social Media!
Leave a Reply