Christmas in November is in full flow in our home! Most rooms are filled with trees, lights and decorations. But .. there’s always more room for more! 😉 And DIY Christmas decorations are the BEST! Especially when they are simple and quick like this Christmas bauble tree made from mini baubles. I mean, how cute has this turned out? Here’s how you can make your own:
here’s What you need
- A picture frame – I got mine from The Range for £3.49. I can’t see it on-line so you may have to check out your local store! It’s an 8 x 10 frame called “Roma White”.
- Some paper for the background (see below on where I got mine!)
- Mod Podge (or some normal glue to stick down the paper)
- Mini baubles – Mine came from The Range – £2.99 for a box of 49 miniature baubles. They don’t do them on line but Amazon do some lovely gold ones here.
- Hot glue
Here’s a close up of the frame I used – I just love the detail but of course you can go for any frame you want!

I started with taking the glass out of the frame.
Next, I grabbed some Christmas scrapbook paper for the background. I got this Christmas design pad with double sized paper in The Works for the bargain price of £3! Other places on line usually charge at least £9.99 for pads like this, so at £3 I really suggest you snap it up!

Next I traced the paper to size and mod podged it onto the back before popping it back in the frame. This is going to form the background to your bauble tree. I chose a paper that had some pattern to it, but wasn’t too dark or hectic as I wanted the bauble tree to stand out. But of course you can go for any pattern that suits you!
making your bauble tree
And now for the fun bit 😉 Hot glue a mini bauble in the centre at the bottom of your frame. This will be your starting point for the bauble tree.

Next, finish gluing the row of 5 miniature baubles. Then a row of 4, 3, 2 and finally 1 bauble. So it looks like this. I just placed these on the paper for the sake of the photo. They’re not glued down, but you get the idea!
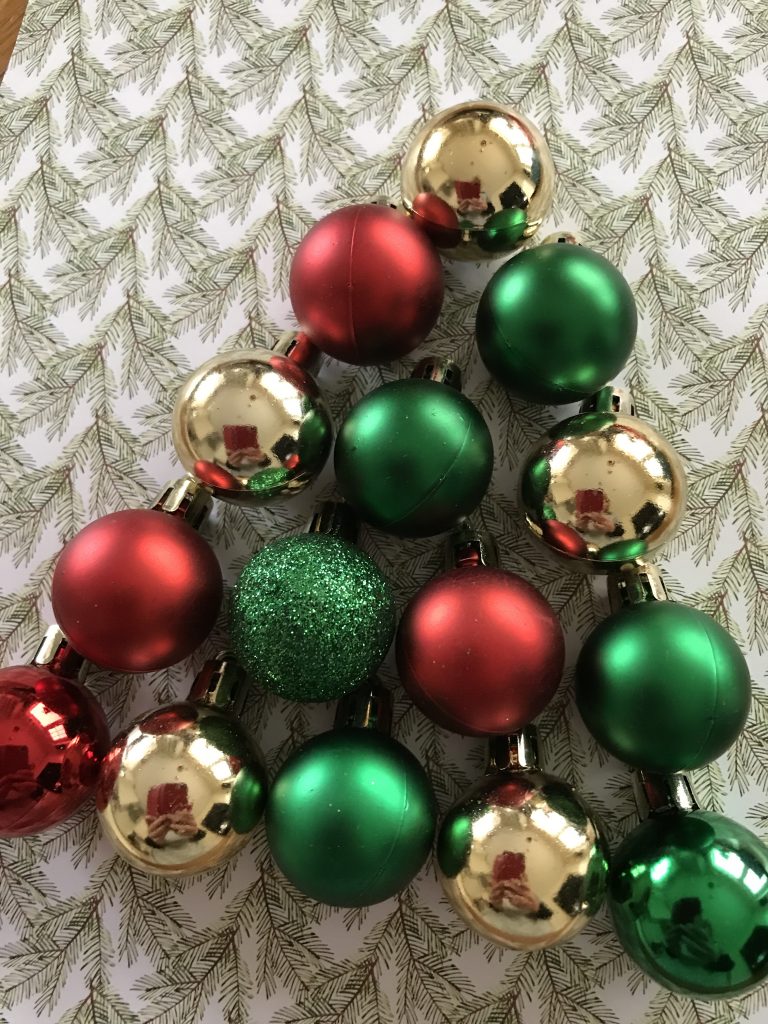
But I’ve not finished! I didn’t want the paper to show so I layered more baubles on top. You hot glue some more baubles to fill in all the gaps. It’s personal preference whether you want the tops of the baubles to show or not. If not, you can drop those babies into the gaps to hide the top. Like this:

Continue this all the way until your tree is finished. And that’s it!! Told you it was easy 🙂

You can finish it off with a ribbon or some greenery on top if you want, but I think it looks perfect as it is.

Sorry, one last picture to show off its’ cuteness:

I think you’ll love these Christmas projects too!


Please Pin me for later

Some of the links in this post are affiliate links, which means I earn a small commission if you decide to use my links to purchase something (at absolutely no extra cost to you!). This will allow me to continue to share great ideas and projects with you, so I am very grateful for your support!
Follow me on Social Media!


Leave a Reply