Hands up if you’re up for a quick and easy bunny frame project that you can
1) make in no time at all and
2) make on a shoestring?
Yes? Good! I was hoping you’d say that! Let’s go!
here’s what i used for my bunny frame
Now, this is what I had to hand so this list is just a suggestion – you can totally adapt it to your home or what you can find in your local craft shop.
- A 5 x 7 picture frame – I bought mine locally but Amazon has this one on sale
- Pearl Frosted Mint Acrylic paint
- Orange Acrylic paint – similar to this one
- Bunny Shape from Hobbycraft
- Mod Podge
- Colourful card stock – check out some of these at The Range
- Burlap material (left over)
- Small piece of ribbon – similar to this one
- Hot glue
creating a simple tray filler
I’ve been working on my Spring Bunny Coffee Bar (post coming out soon so stay tuned peeps!), but I wanted one more item to fill out a tray. Now, don’t get me wrong, I could easily go and buy something from the shops (it’s one of my secret talents 😉 ), but just like you, I’m on a budget when it comes to decorating.
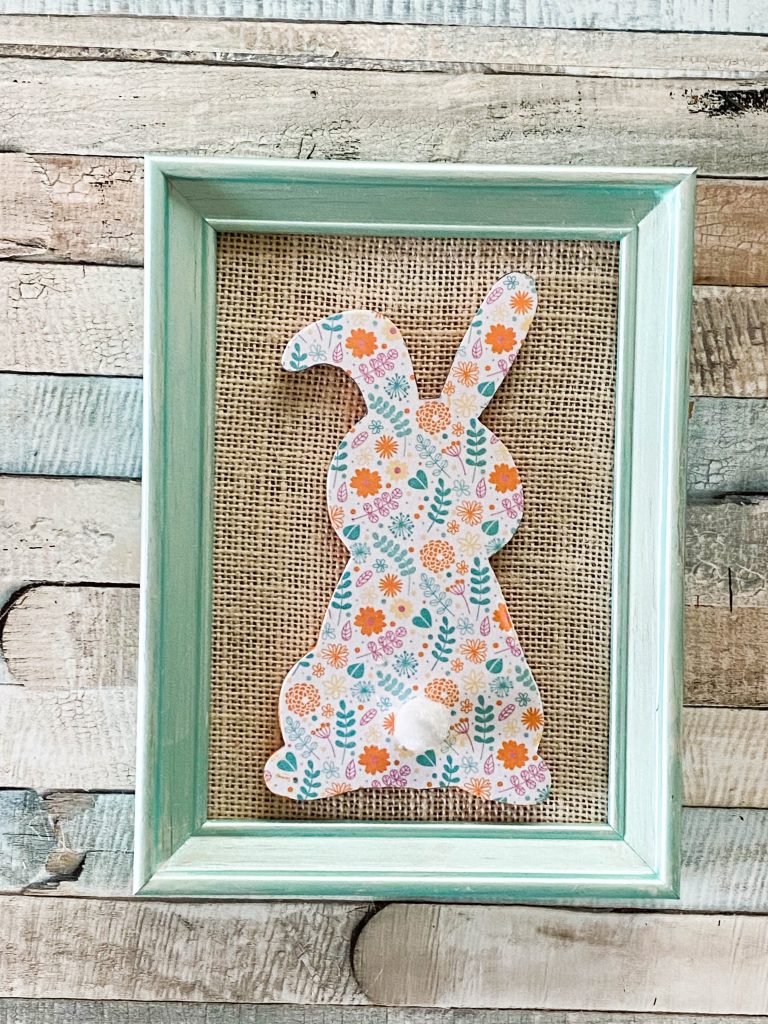
And so I had a look in my craft stash and came across this picture frame I bought in a local shop. It’s only a “cheapy” and not at all the color I wanted, but I figured it’s nothing that a little lick of paint won’t fix!

I popped the plastic cover out and took some metallic paint in my favorite aqua color. Because it’s a metallic paint it didn’t provide a “block” cover and so it took me a few layers to paint it, but I love how the color turned out in the end.
I covered the back of the frame with a small bit of left over burlap material.

Simply apply some Mod Podge on the backing of the frame and place the material over the top. Leave to dry and pop it back in the frame.
Sounds straight forward enough, right? Not for me of course! I do like to create a drama .. Look what a pig’s ear I made of this – LOL! My brand new Mod Podge bottle spilled out everywhere ..

Decorate your bunny
Anyway, once I’d cleared up this mess I turned to work on the bunny. I wanted to add some more color to the sides of the shape and opted for this bright orange to match the paper I had picked out.


Next trace the bunny to cut out the paper and Mod Podge the top of your bunny. Place the paper on top and leave to dry. I did give it another layer of Mod Podge right over the top too.


Once the bunny has completely dried, hot glue your bunny back onto the backing of the frame, straight onto the burlap material.
I did have a look for a more colourful tail, but the pom poms I had were too big for his little bunny butt and it just looked out of place. So I decided to use the one that was on there originally and hot glued that little sucker right back on there.
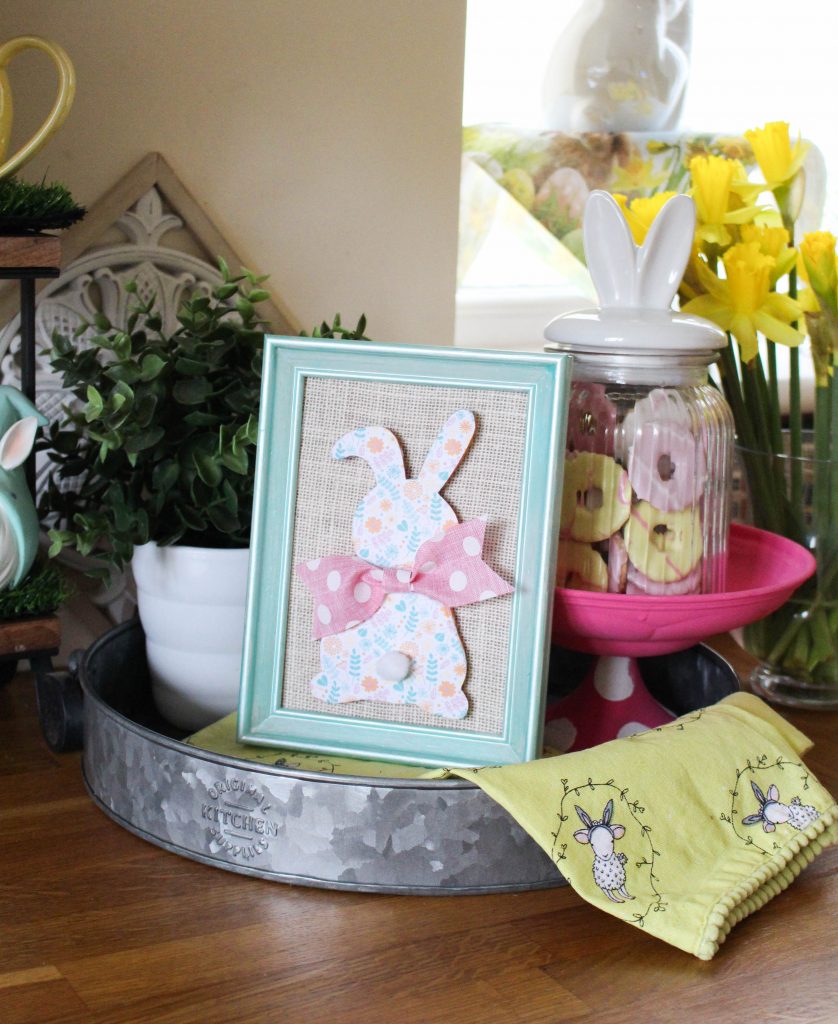
But of course I couldn’t resist adding a bit more colour and created this pink bow with some left over ribbon.
I created the bow shape by tying a small piece of ribbon in the center with a small piece of string.
I then cut a small piece from the same pink ribbon material and wrapped it around the middle to make it look like it was part of the bow. Secure with 2 small dots of hot glue to keep in place. Voila! One easy bow!


Finally, hot glue the bow onto the bunny and you’re all done!
let’s see that little cutie!

Now, isn’t that the CHEAPEST, EASIEST AND MOST ADORABLE little bunny addition?

And of course you can make it custom colour to your own decor too! See how the bunny frame matches the turquoise gonk on the left – I can’t wait to show you the full bunny bar!

In case you wondered, the tray came from Next. I can’t see the exact same one, but Amazon do a very similar one here.
Would you Pin me for later?

Some of the links in this post may be affiliate links, which means I earn a small commission if you decide to use my link to purchase something, at no extra cost to you! This will allow me to continue to share great ideas and projects with you guys, so I would be grateful if you did ?
I think you’ll like these easy projects too!


Find me on Social Media!


Leave a Reply