Sometimes hunting around for craft items frustrates me! You know what I mean? When you set out with a specific idea of what to get, but you can’t find ANY of the items you had in mind. Like this week .. my plan was to buy a large Valentine gift bag for a project, .. but ended up going home with this sale Christmas item for 45p. Nearly the same thing .. right? No, I know .. it’s no where near, BUT I think I made it work to COMPLETELY transform it into a super-cute sign by giving it a simple Valentine make-over!
here’s what i used for my valentine make-over project
A 45p Christmas wreath decoration from The Range
A pack of love hearts from The Range
Red, white and pink acrylic paint
Mod Podge
Red Glitter
Hot Glue
A small chopping board from IKEA
Some heart ribbon and ribbon left overs
Red and white baker’s twine
all you need is love
To be honest, I wasn’t quite sure what I was going to do with this ornament. At best I figured I could completely redo it. Or at the very least I could use the “LOVE” cut out by pulling it off the wreath and incorporating it into a Valentine sign.

As a starter, I tried placing the love hearts onto the wreath to see how it would look and instantly knew this was the way to go! All it needed was some gorgeous colour.

I used a variety of reds and pinks to paint all the love hearts. They only took one coat of paint so it was so quick to do! Leave to dry before hot gluing into place.

As the love hearts were not going to cover ALL of the background, I opted to paint the wreath in the same colour red. Just to make them blend in where there are some gaps.

adding some valentine love to your wreath
Once that was dry, I hot glued the hearts in random fashion all around the wreath. I recommend to have a trial run placing them down first before attaching them with the glue!

As you can see, I couldn’t resist adding some glitter to some of the hearts. I didn’t glitter all of the red ones, but just the larger red hearts. Add Mod Podge to the heart you want to sparkle, sprinkle glitter and leave to dry.

I wanted to add a neutral background to the wreath and opted for a small chopping board from Ikea to hot glue it straight on to. I use these small chopping boards a LOT – you can catch a cute Easter project where I’ve used one right here.
But before adding the wreath I hot glued a small strip of gingham love hearts to the bottom of the board.

Once the wreath was hot glued on the board, I decided to paint some white curves on the larger pink hearts to prevent them from looking too “2D” 🙂

it’s all about the Finishing touches
And for the eagle eyed readers, you will notice that I also added one more love heart in place where the ribbon was before.
This was a last minute decision as having a ribbon ON the wreath just didn’t look right. It covered too much of the design I’d just spent time creating!
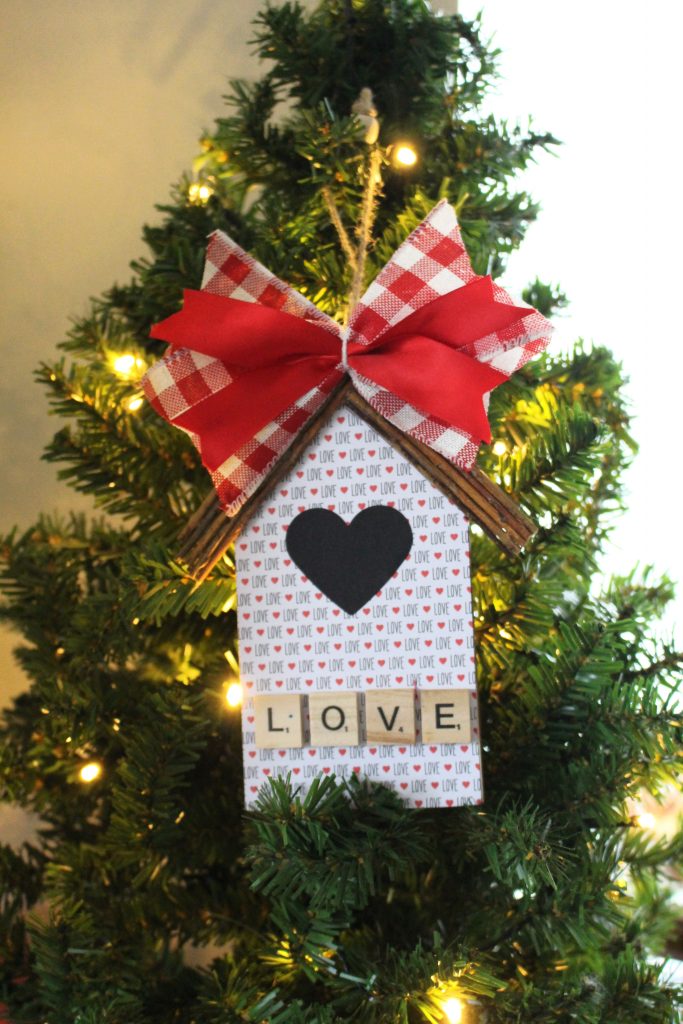
So, instead I created a messy bow with some left over Christmas ribbons and hot glued this onto the “neck” of the chopping board. Add some baker’s twine to hang your design and you’re done!

CUTE, right??

The glitter hearts actually match the ribbon perfectly!

One last thing I added was a single heart on the ribbon. It hides the baker’s twine as well as bringing in even more of the LOOOOVE theme 😉

All in all, including the chopping board, this project cost me just over £5 to make, but I still have some heart ribbon left over for other projects. Now, how’s that for a Valentine decor bargain?
Make sure to Pin me!

Some of the links in this post may be affiliate links, which means I earn a small commission if you decide to use my link to purchase something, at no extra cost to you! This will allow me to continue to share great ideas and projects with you guys, so I would be grateful if you did 🙂
Want more LOOOVE??
Check out these previous projects!


Follow me on Social Media!


Leave a Reply