Sometimes things just aren’t as they seem! Or at the very least you can transform them into something completely different. This craft Easter Egg from Hobbycraft for instance .. Sure, it would be cute as an egg, but how much more adorable would it be as a little fuzzy duck? Can you see it yet? Stick with me!
here’s what you need for your fuzzy duck makeover
I used this Easter Egg from Hobbycraft. (And The Works do one bigger and cheaper here)
Yellow acrylic paint
Two of these foam egg shapes
Hot glue
Yellow boa or some yellow feathers
A wooden chopping board from Ikea
Some burlap left over material
Mod Podge
A few colourful ribbons from my favorite ribbon lady right here
Wiggly eyes – check out this variety pack here
Let’s get started
First thing first, I removed the small embellishments on the egg. But of course I kept the little bunny – I’m sure I’ll find a use for it with another project!

Next I took some yellow acrylic paint and mixed it with some white to make a softer yellow. I painted the egg yellow with a few layers of acrylic paint.
I made this project on a Facebook Live and took some still pics from the project.

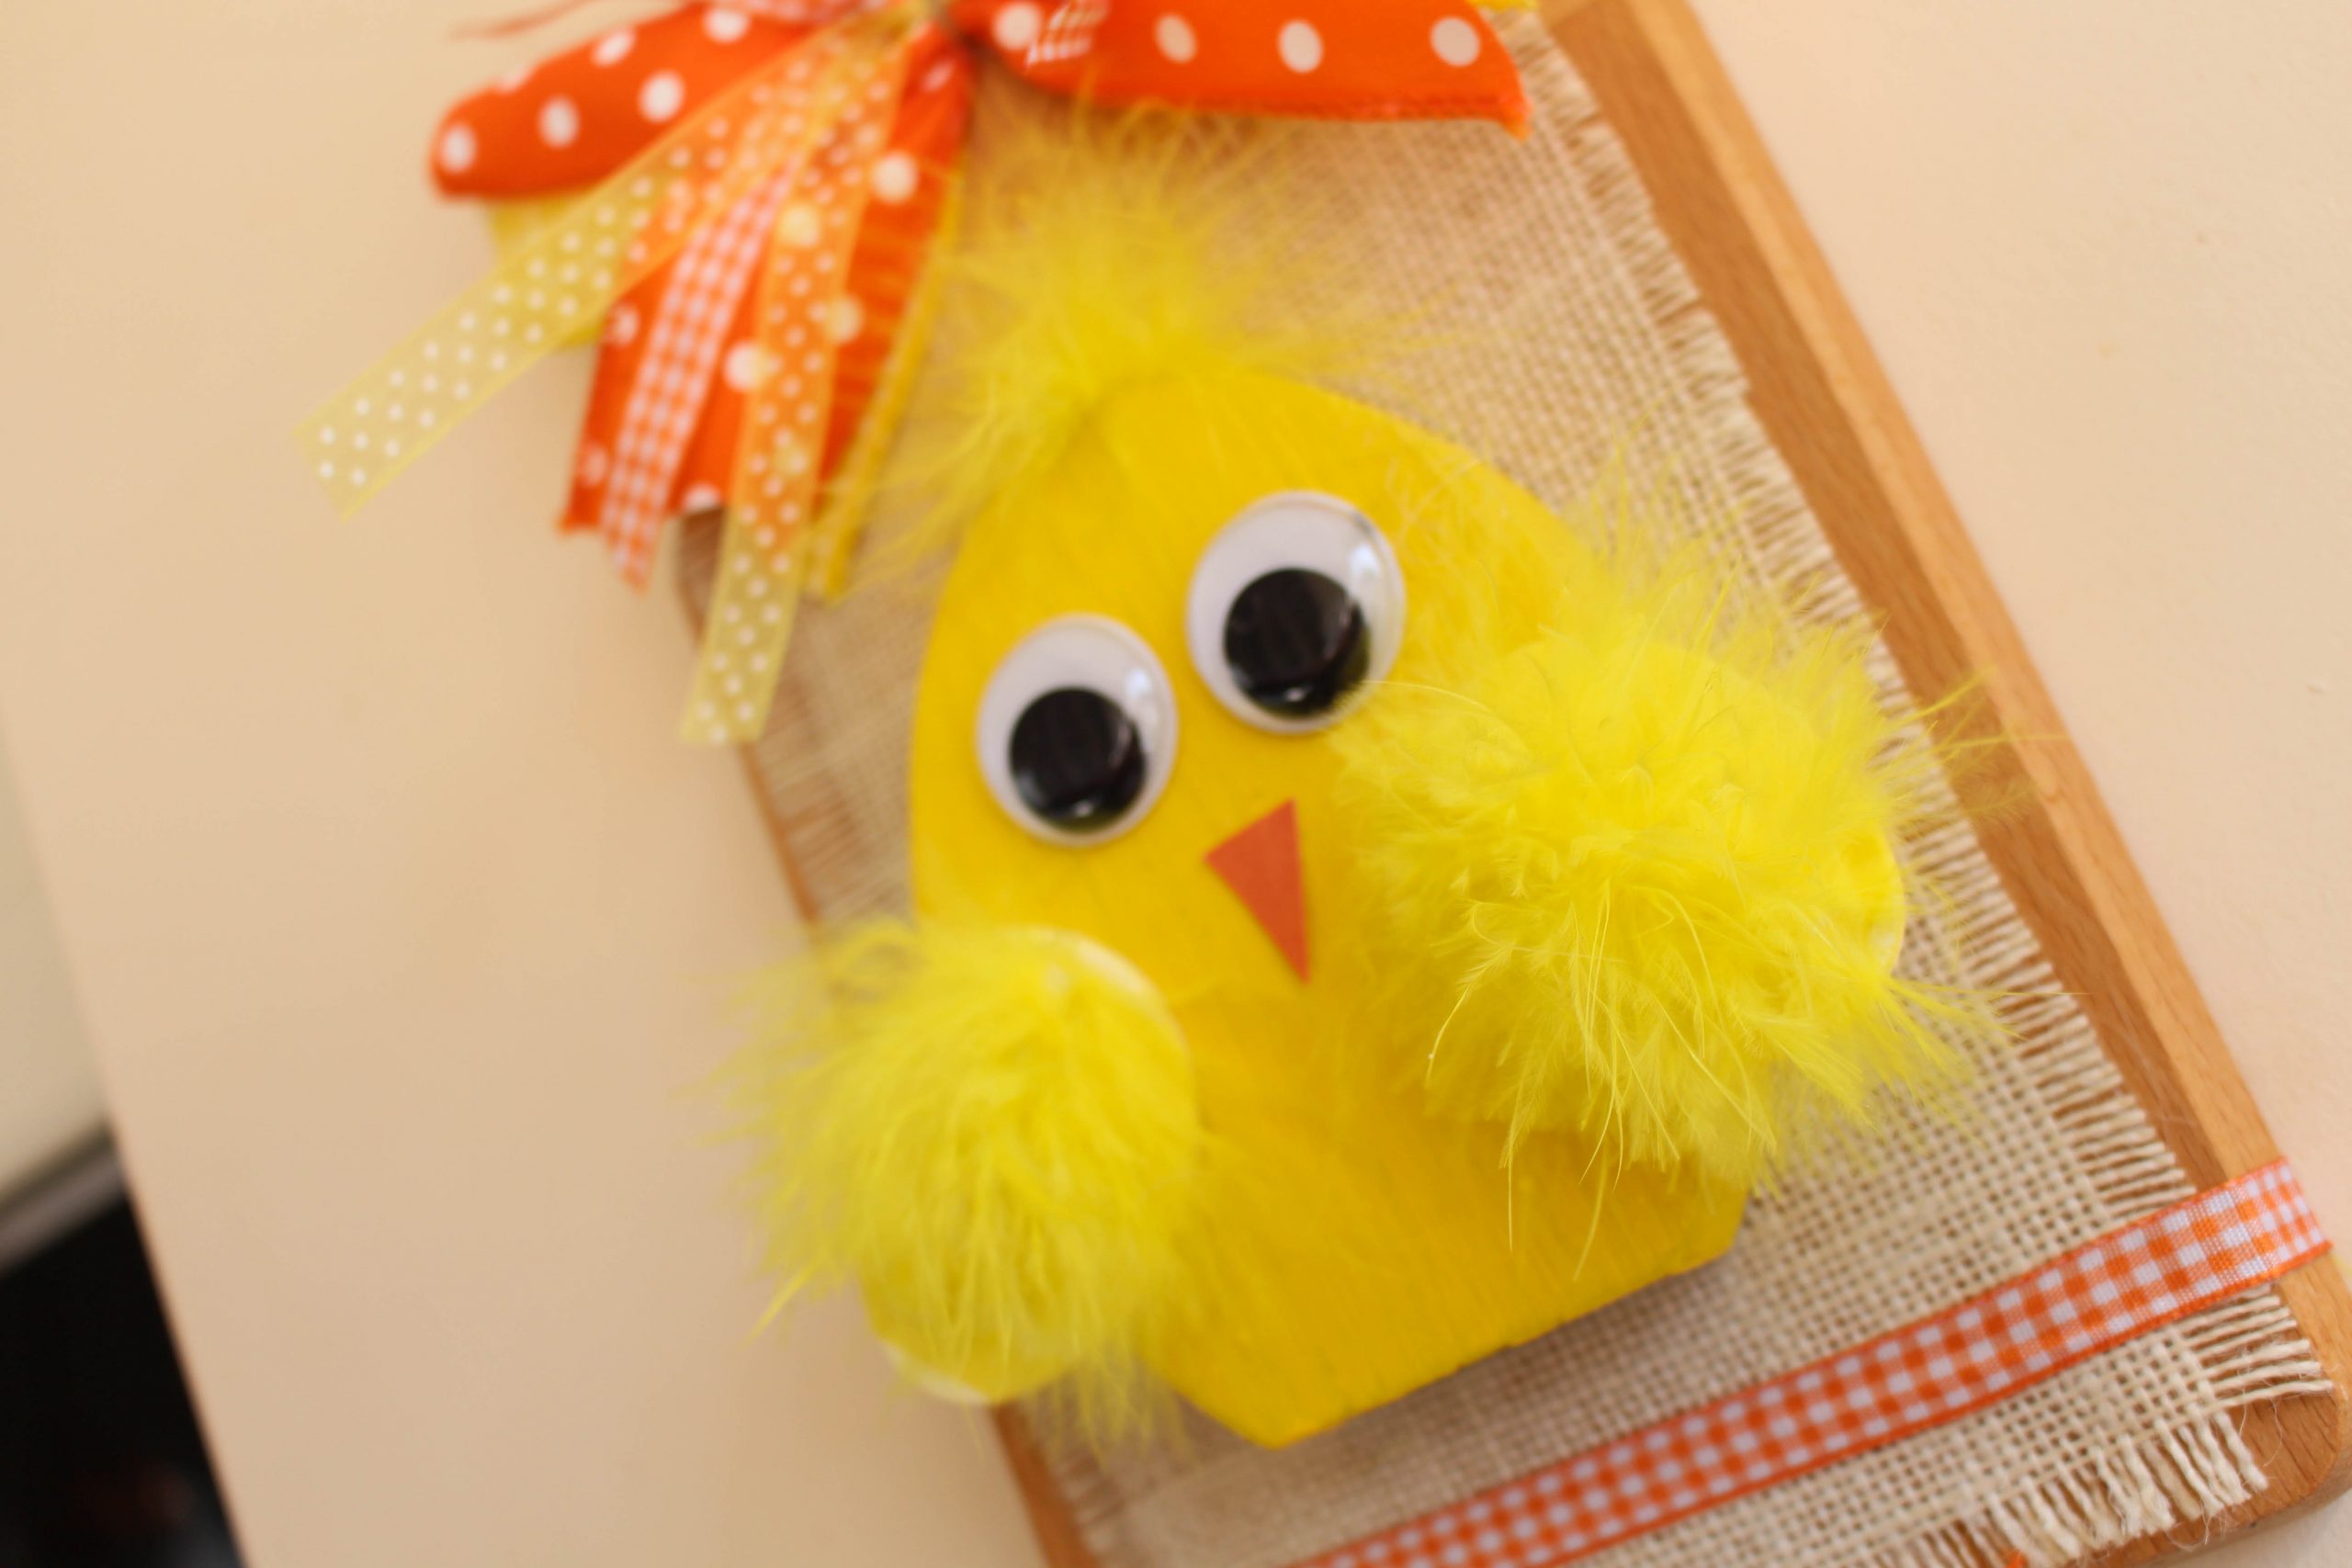
Once the paint is fully dried, take 2 of the yellow foam eggs and glue them on at an angle to create the wings. I used some fluffy boa to hot glue straight onto the wings to add some fuzz. If you can’t find a boa, using some yellow fluffy bright feathers will do the trick too!

Next, I added some googly eyes and snipped off a small triangle of orange card for the beak.
Oh, and I gave him a funky hairdo on the top too! Just hot glue a tiny bit of fuzzy boa to his head.

chop chop!
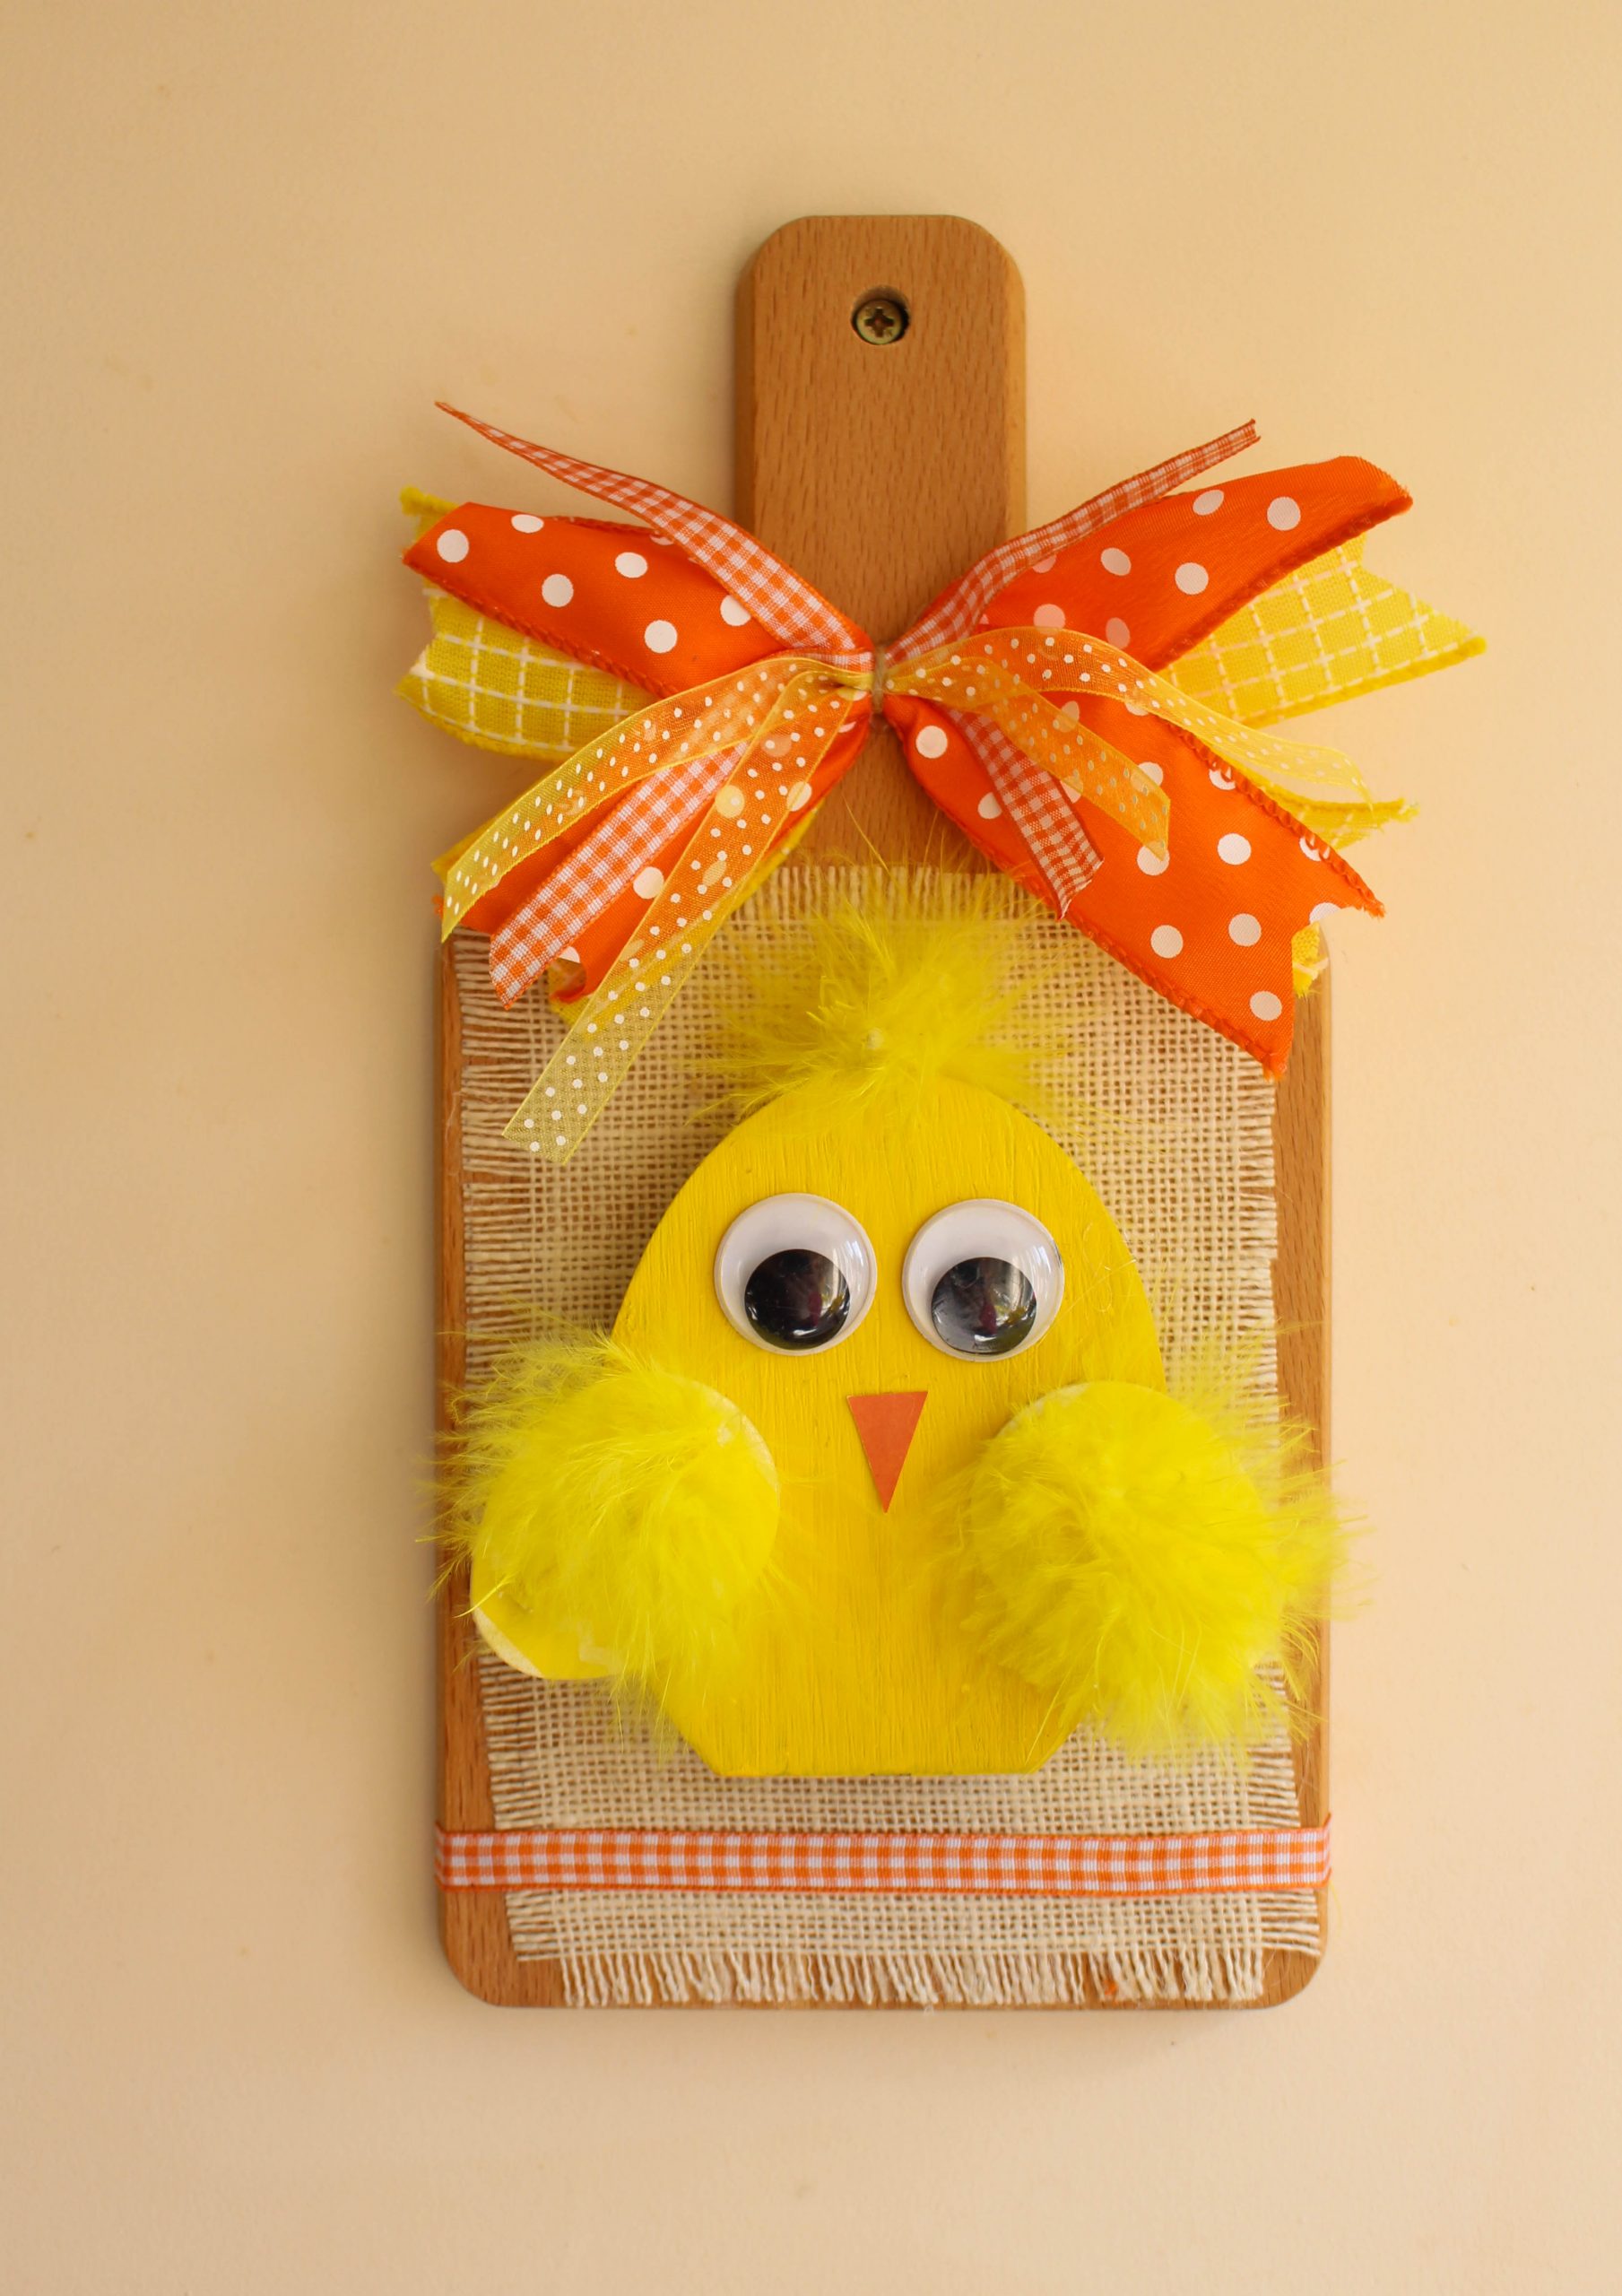
Of course our little fuzzy duck would look adorable on a tray just as is, but I wanted to add him to a background so you can have it hanging somewhere. I took one of the IKEA chopping boards (check out another project with one of these right here) to create the backdrop.
I measured out a small bit of Hessian material, cut it to size and used Mod Podge to attach it straight onto the chopping board.


Next, I hot glued our fuzzy friend straight onto the chopping board. That’s my “how cute is he?” expression 😉
To fill out some of the gaps at the bottom I used a small bit of ribbon for extra colour. Instead, you can totally make this your own by hot gluing on some scrabble craft tiles and spell some words if you want to instead!
And of course I couldn’t resist creating a messy bow in matching colors, sticking to the whole yellow and orange vibe.

All we need to do now is to name him! I kinda like Waddles but let me know your suggestions! 😉
From EGG to Fluffy duck!
I tried to take some photos where the light was good so you can get an idea of how bright and colourful he’s turned out!
I love his goofy hair-do!
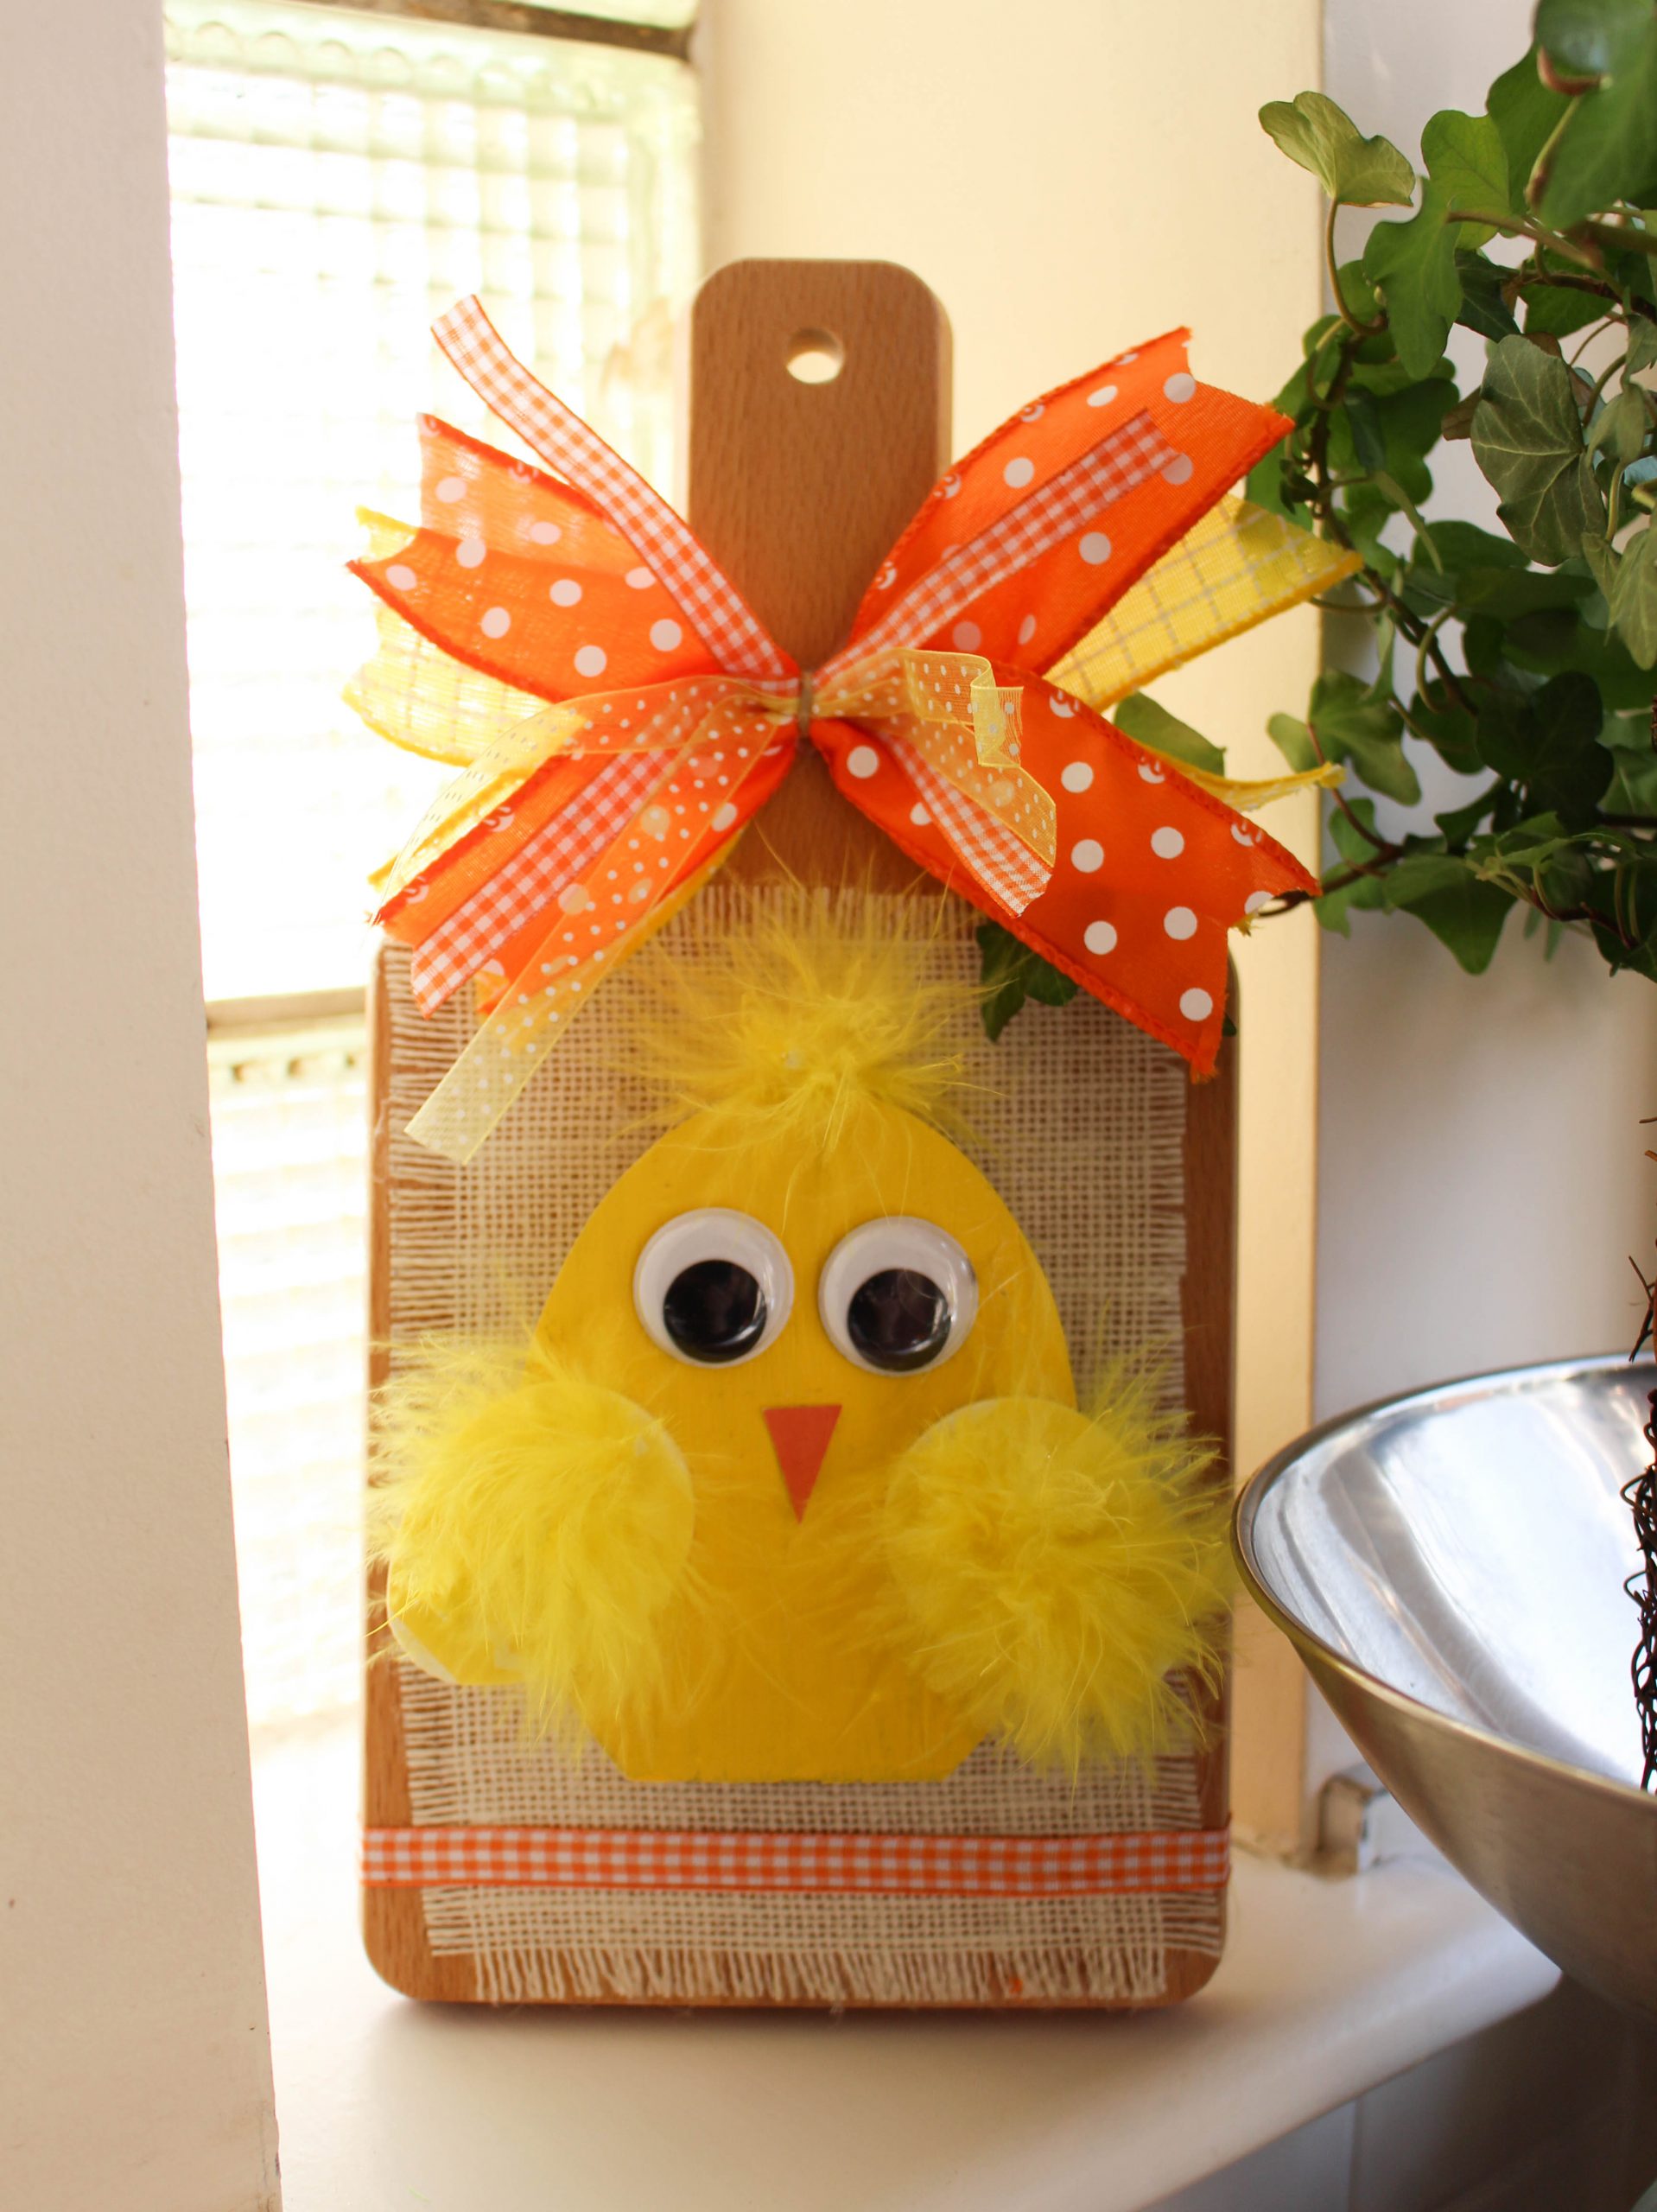
And here’s where Waddles now lives in our kitchen.

We’ve got a little alcove that gets a bit dark sometimes so he was perfect for adding some brightness and a pop of fun colour!

Pin me for for later!

Some of the links in this post may be affiliate links, which means I earn a small commission if you decide to use my link to purchase something, at no extra cost to you! This will allow me to continue to share great ideas and projects with you guys, so I would be grateful if you did ?
Check out these cute projects too!


Follow me on Social Media!


Leave a Reply